
Thank you for choosing FurBlower PAWS. Identify your model before following the instructions for its supported setup.
Check the package
Before use, check that the basic package contains:
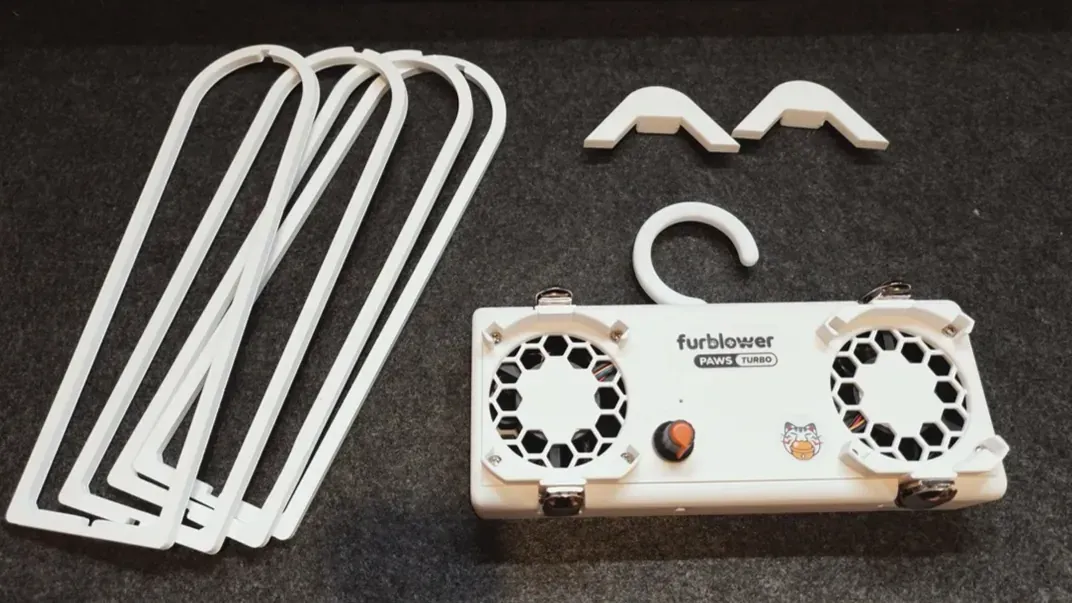
- One unit
- One set of tabletop supports
- One set of stand feet
- One drawstring storage bag
The PAWS TURBO Duct model also includes two ducts. A USB-C cable, charger and lightweight hanger are not included.
If anything is missing, use the contact button at the bottom of this page.
Identify the model and power supply
Identify your model by the USB-C port and clips. The Duct model has plastic duct clips and is the only model that accepts ducts. Standard PAWS and PAWS TURBO have metal paw clips.
| Feature | PAWS | PAWS TURBO | PAWS TURBO Duct |
|---|---|---|---|
| USB-C port | Front | Side | Side |
| Tabletop use | Yes | Yes | Yes |
| Clip paws while hanging | Yes | Yes | No |
| Duct use | No | No | Yes |
| Included ducts | None | None | Two |
PAWS needs a 5V/1A power supply and starts at a fixed speed when connected by USB-C. For either TURBO model, we recommend a PD/QC charger rated at 45W or more with a 12V/3A output profile, plus a compatible cable. This is a recommendation for the charger, not the unit’s measured power consumption. Check the charger’s actual output profiles rather than its total wattage alone.
| Supply voltage | PAWS | PAWS TURBO / Duct |
|---|---|---|
| 5V | Full speed | Fixed minimum speed; no speed control |
| 9V | Unsupported | About 50% speed; cannot reach full speed |
| 12V | Unsupported | Full speed range and maximum speed |
After connecting power to a TURBO model, turn the dial clockwise until it clicks to start the fans. Turn it further to adjust speed. If the supply is insufficient, turn the dial back to off, reconnect power, then increase speed gradually.
Tabletop use
All three models support the tabletop stand. Disconnect power before assembly.
Attach the feet
Align a stand foot with the slot on the side of the unit.
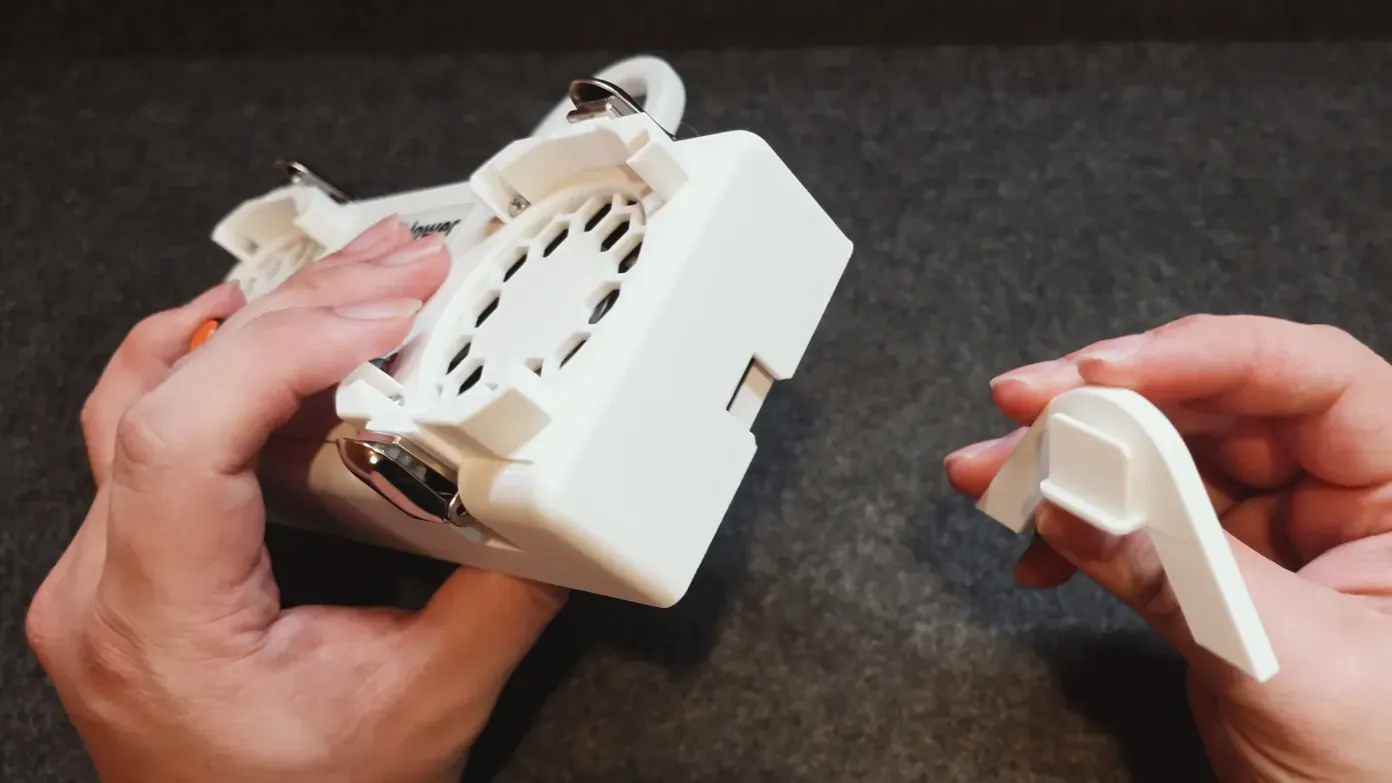
Slide the foot upward into the slot.
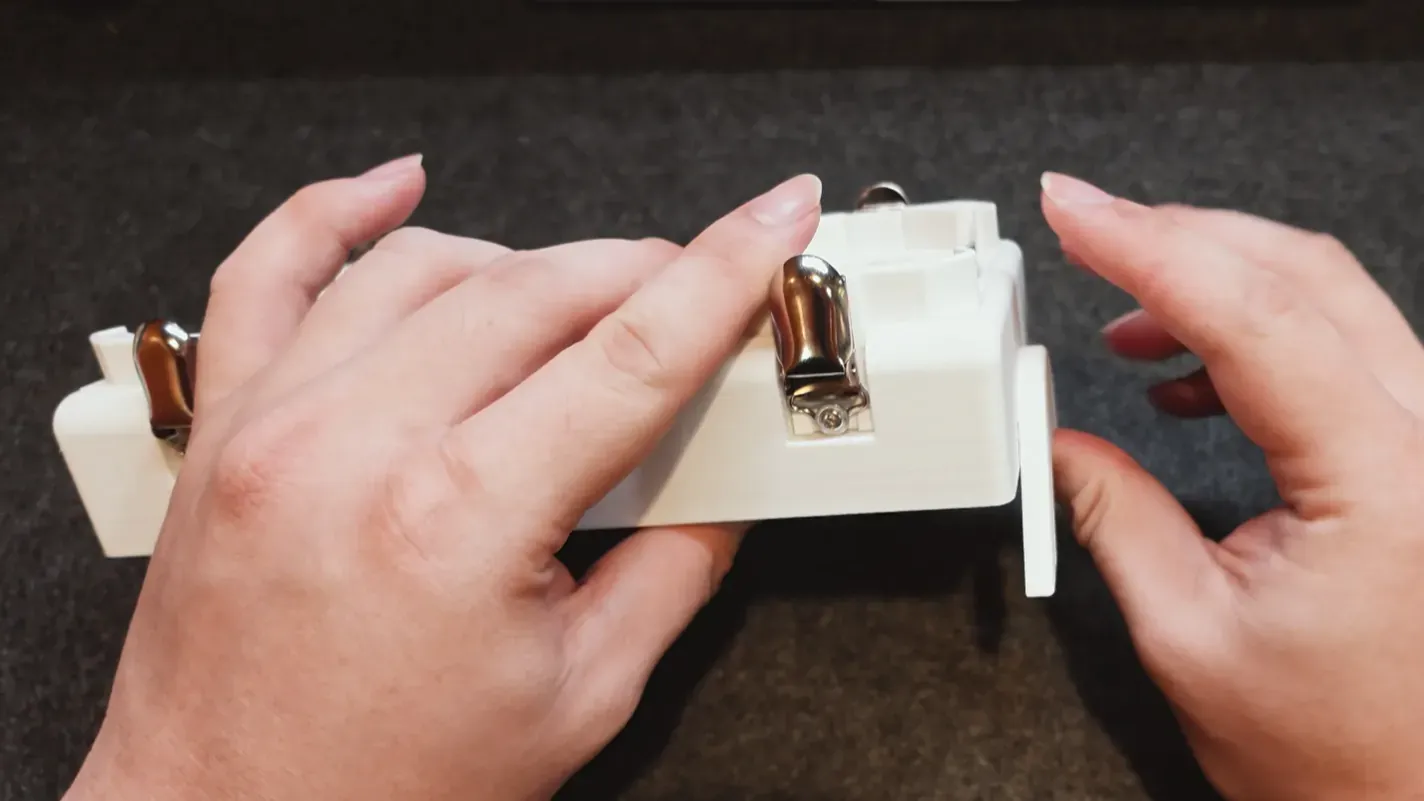
Repeat on the other side.
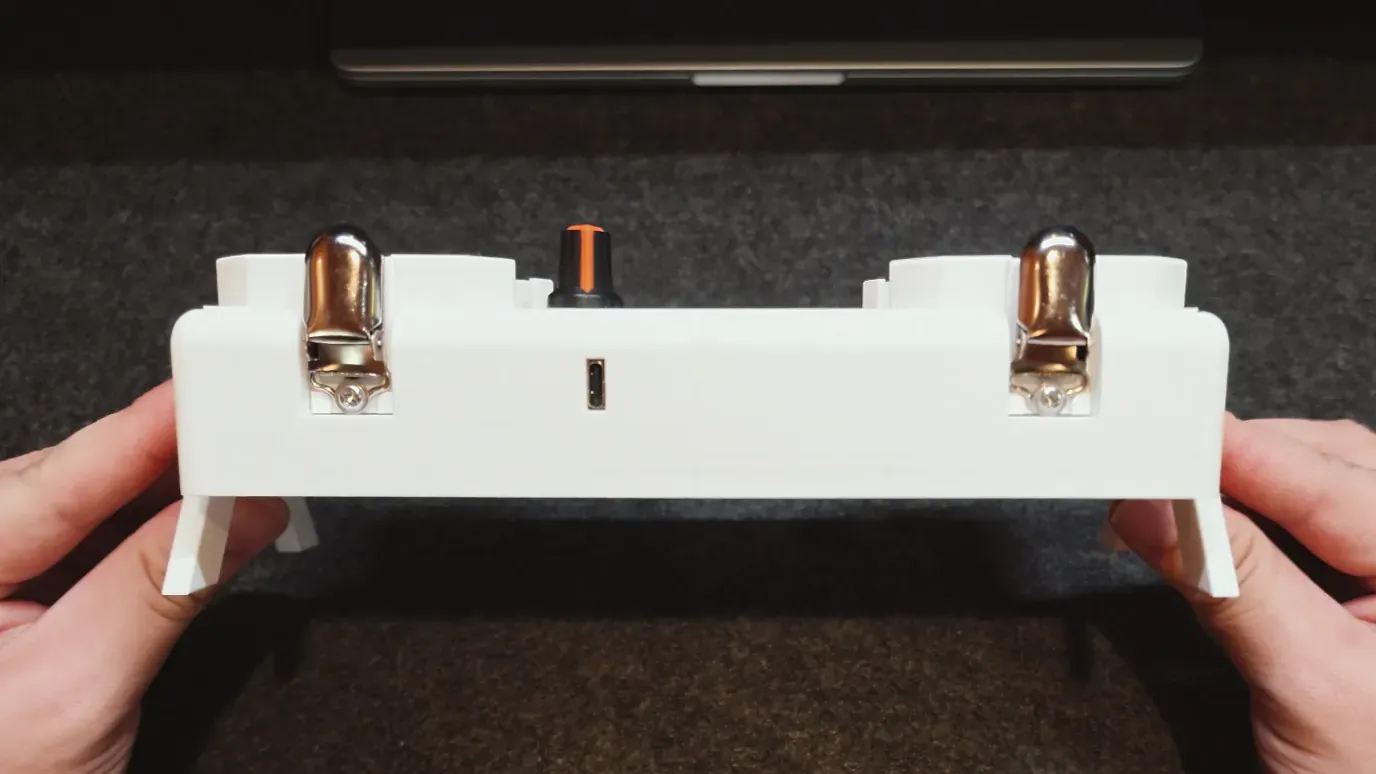
Assemble and attach the supports
There are two tabletop supports. Take one and align the lower notches.
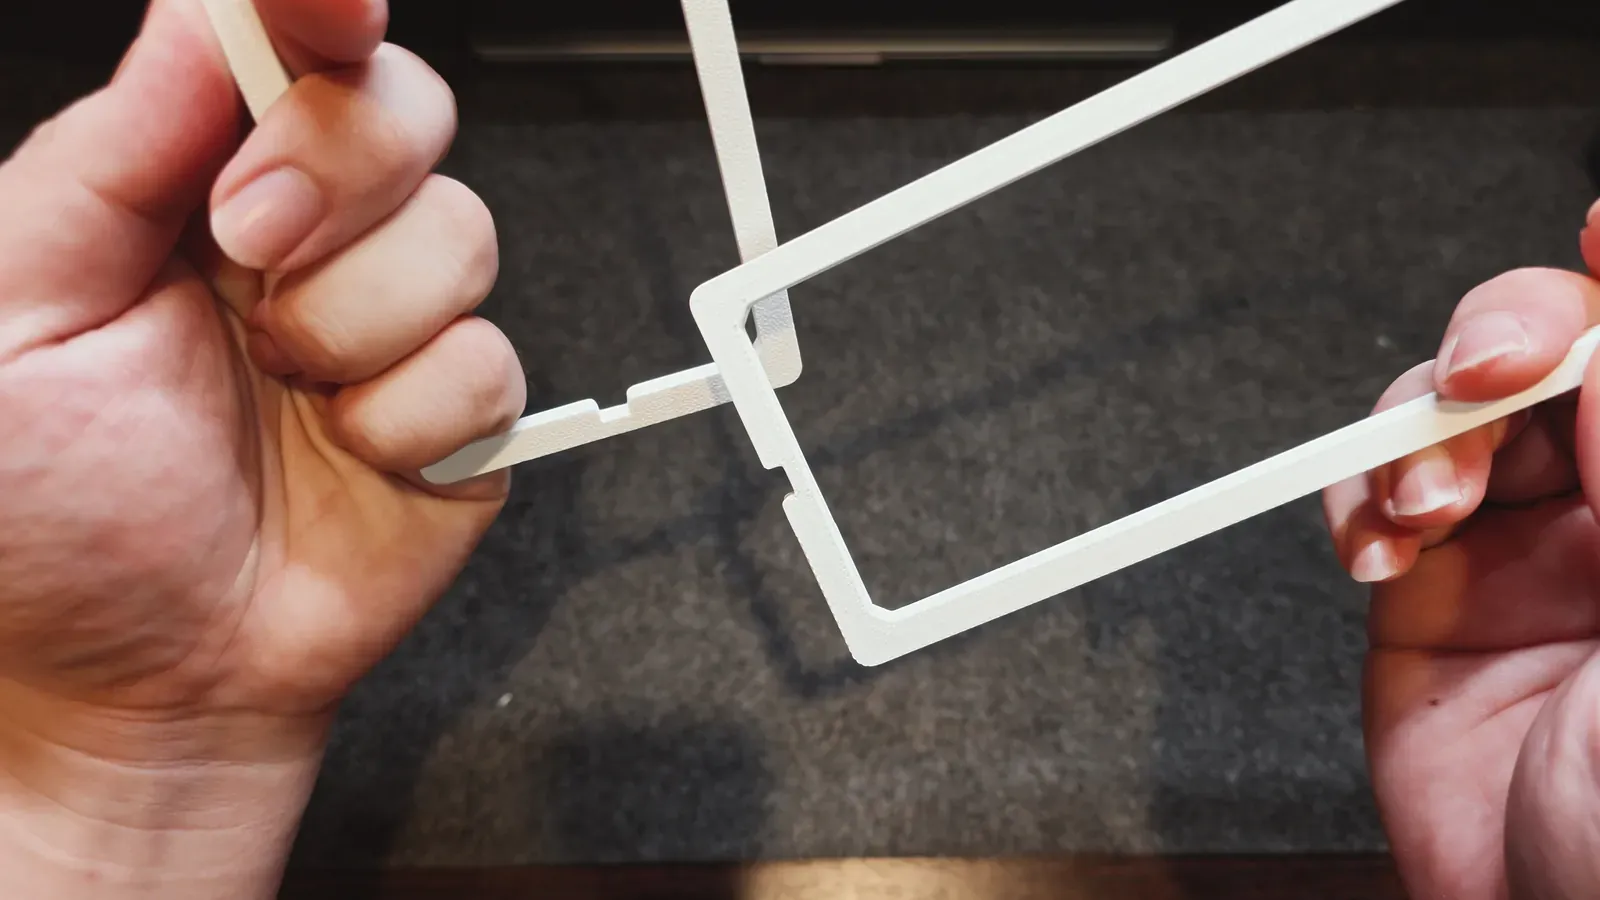
Fit the lower notches together.
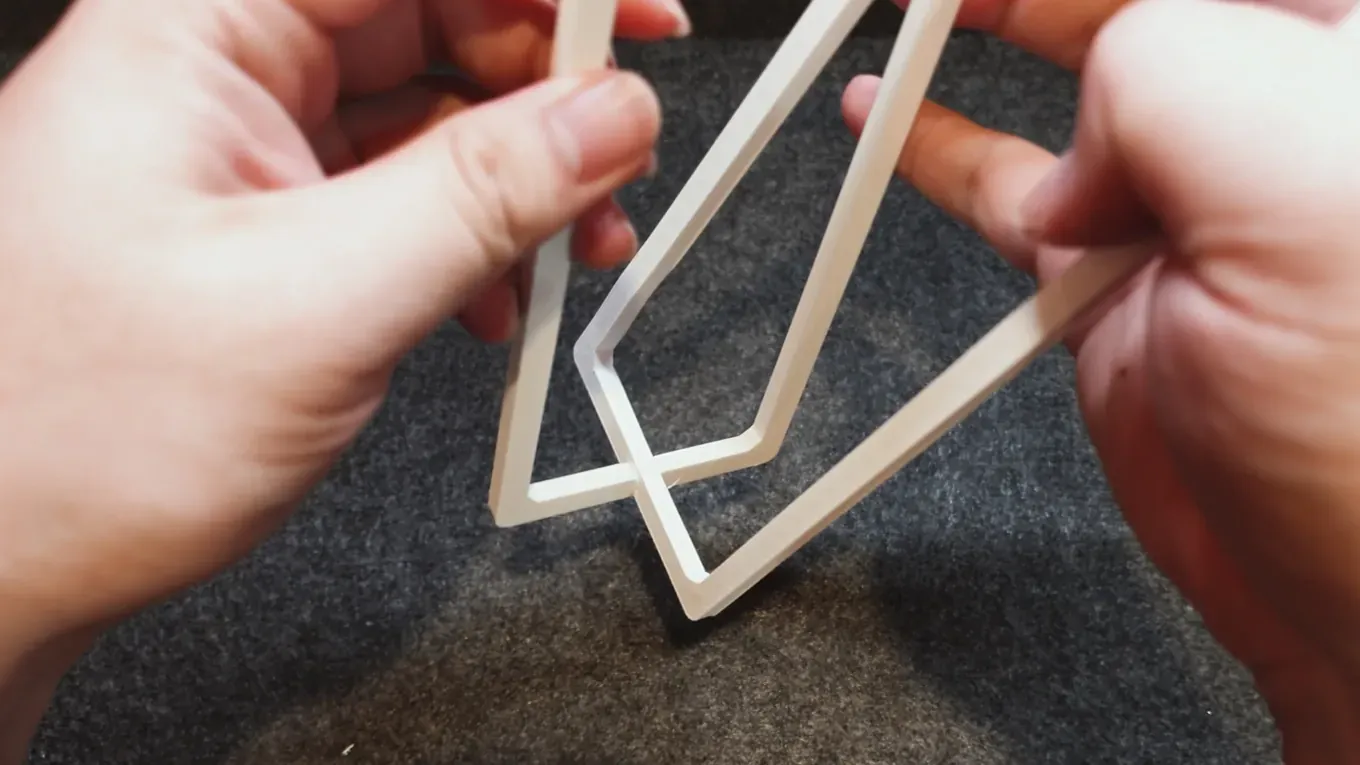
Slide the upper recessed piece into its matching opening.
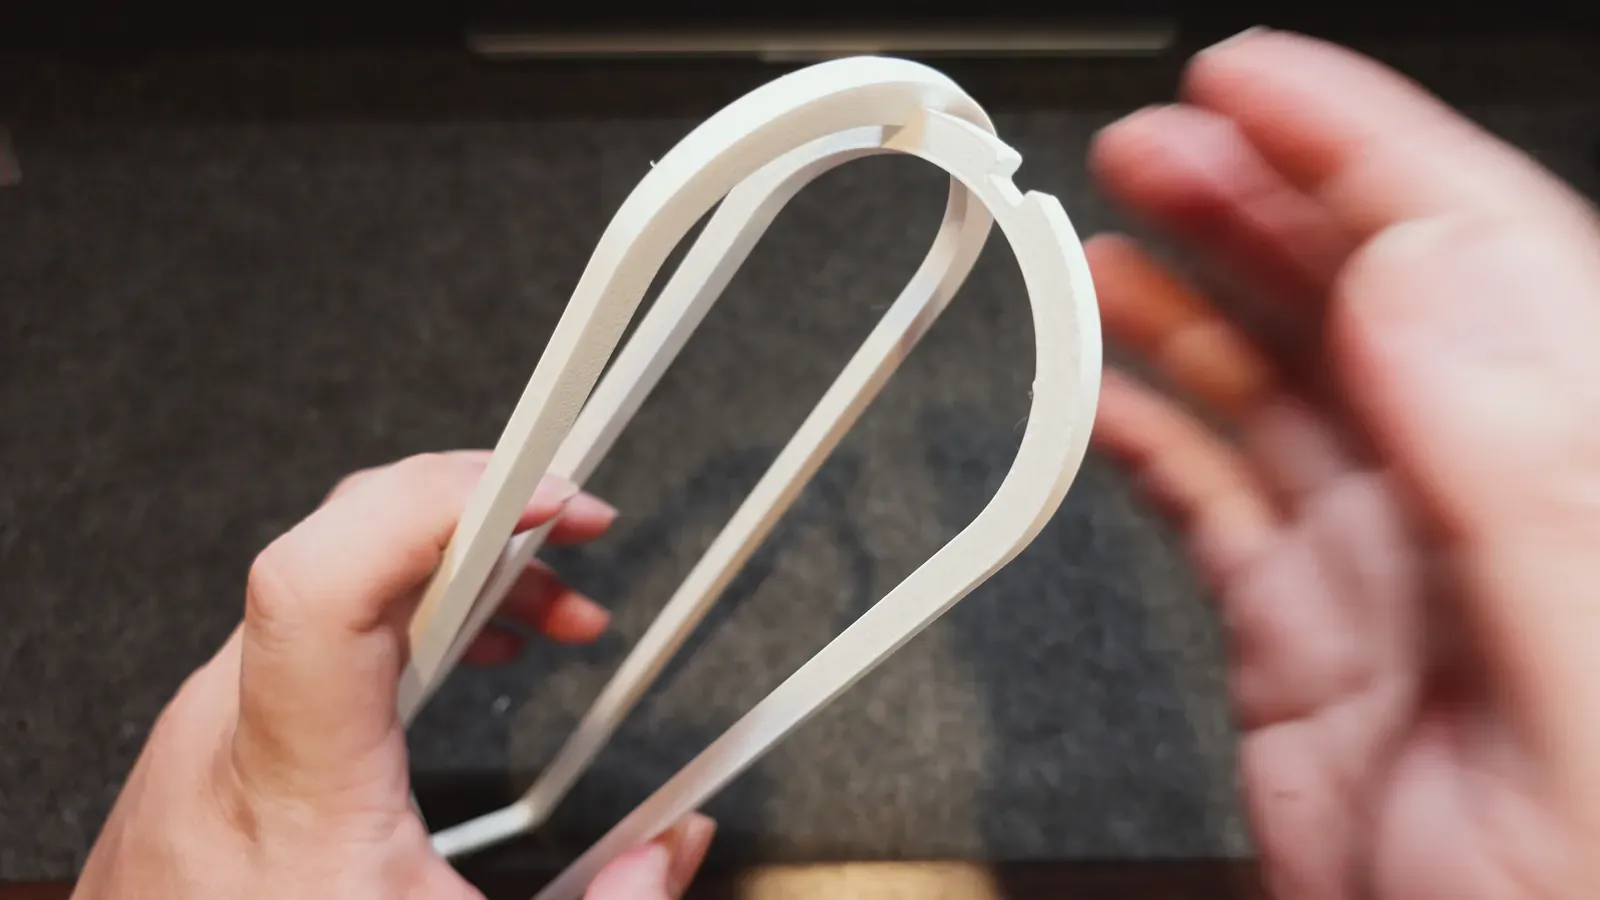
Make sure it locks in place. Assemble the second support in the same way.
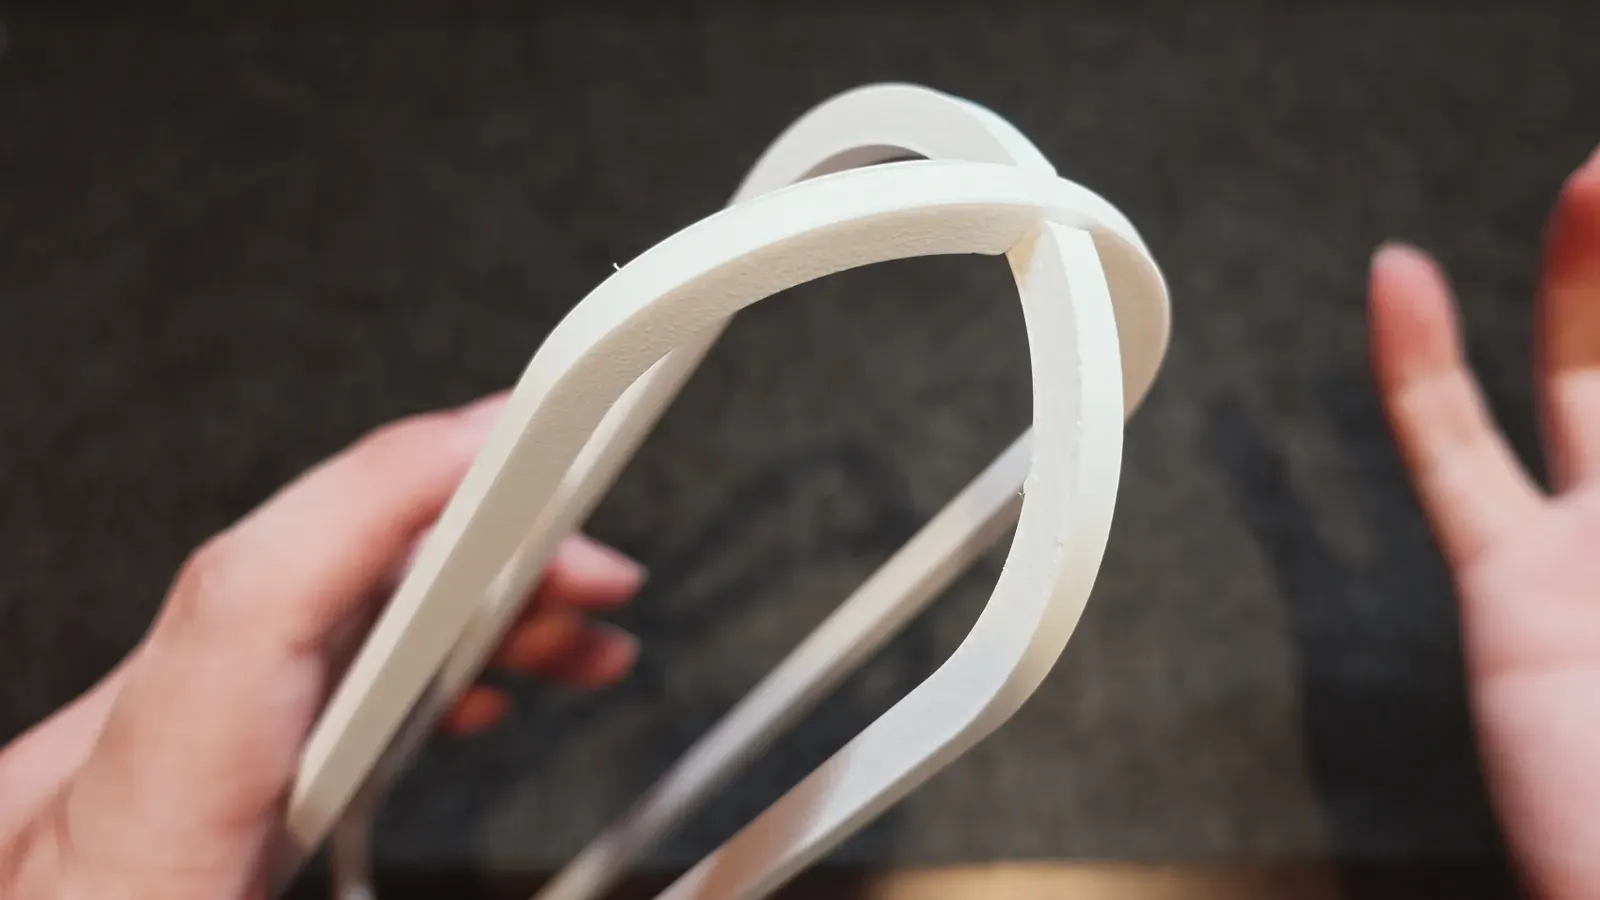
Line up the assembled supports with the four slots on the front of the unit.
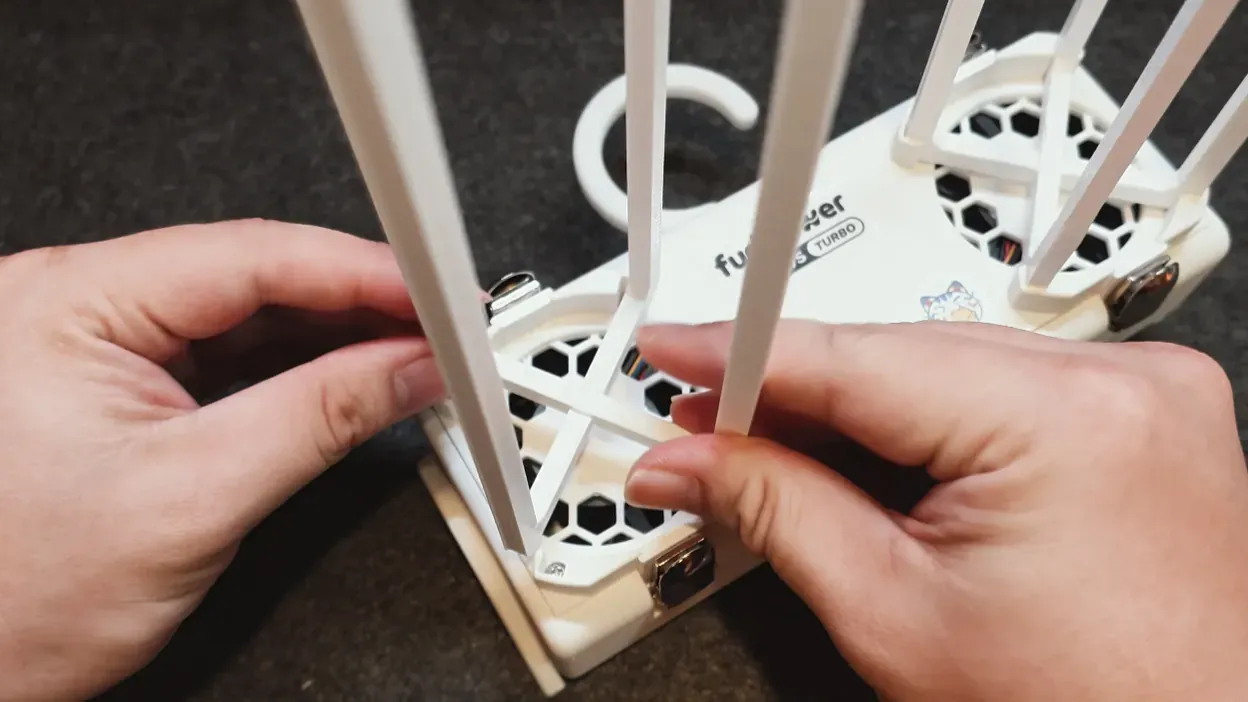
Check their alignment with the slots.
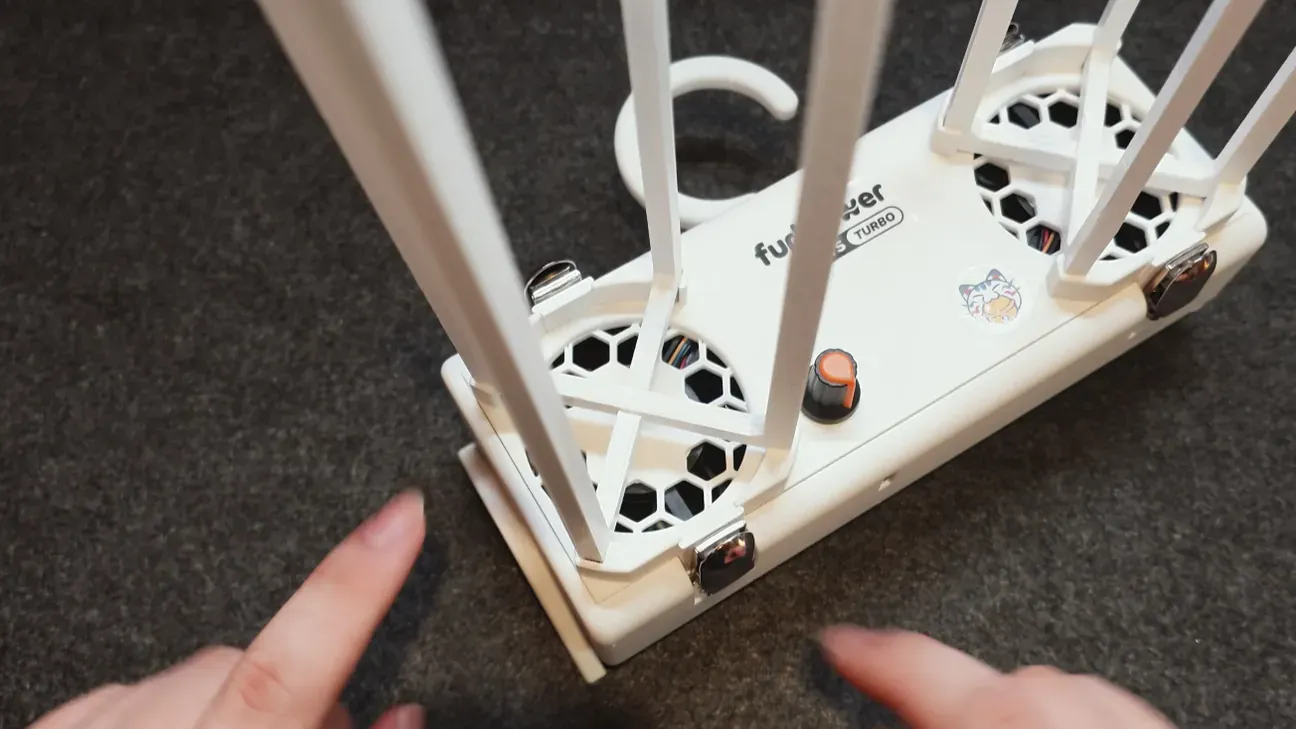
Press them downward into the slots.
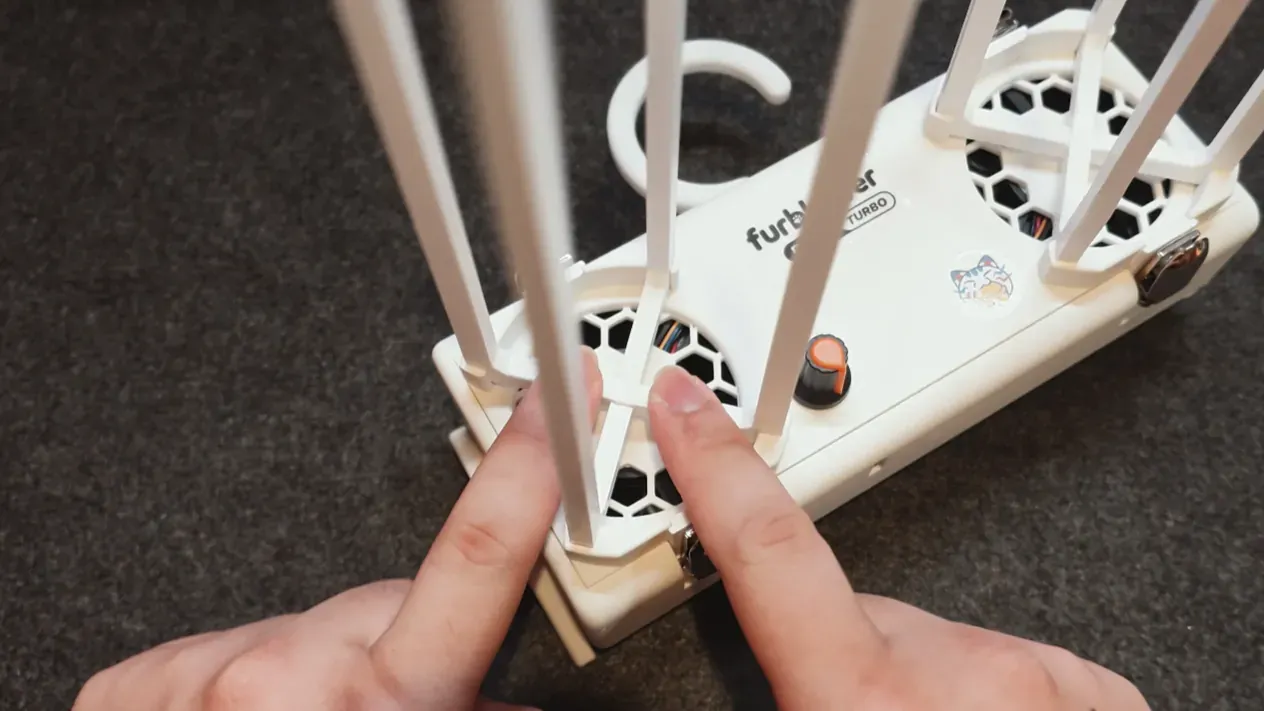
Make sure the supports are secure.
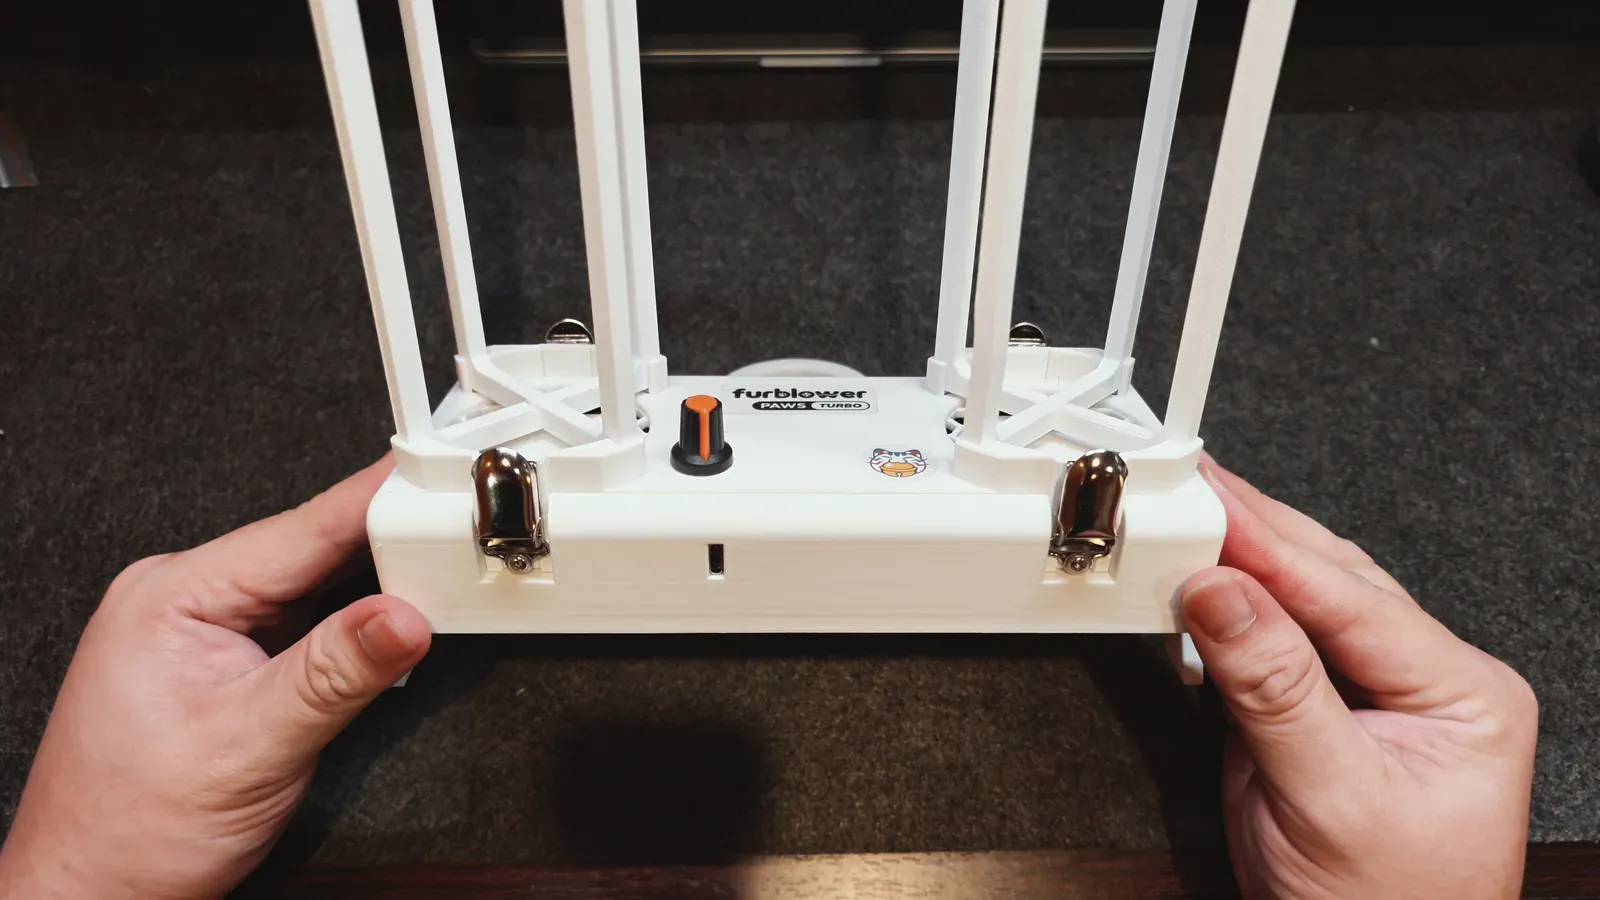
Once both supports are attached, the tabletop setup is ready.
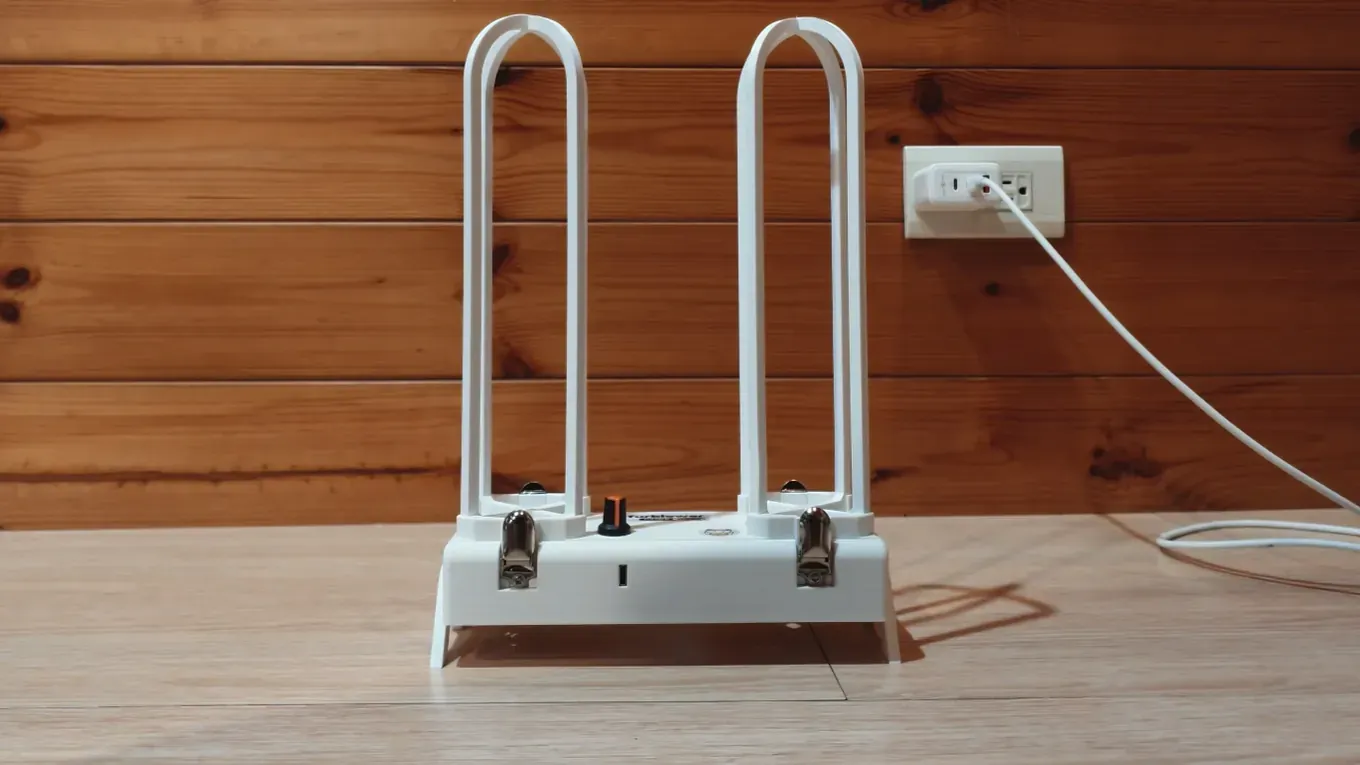
Connect power and fit the paws
Check your charger and cable against the power table above, then connect USB-C.
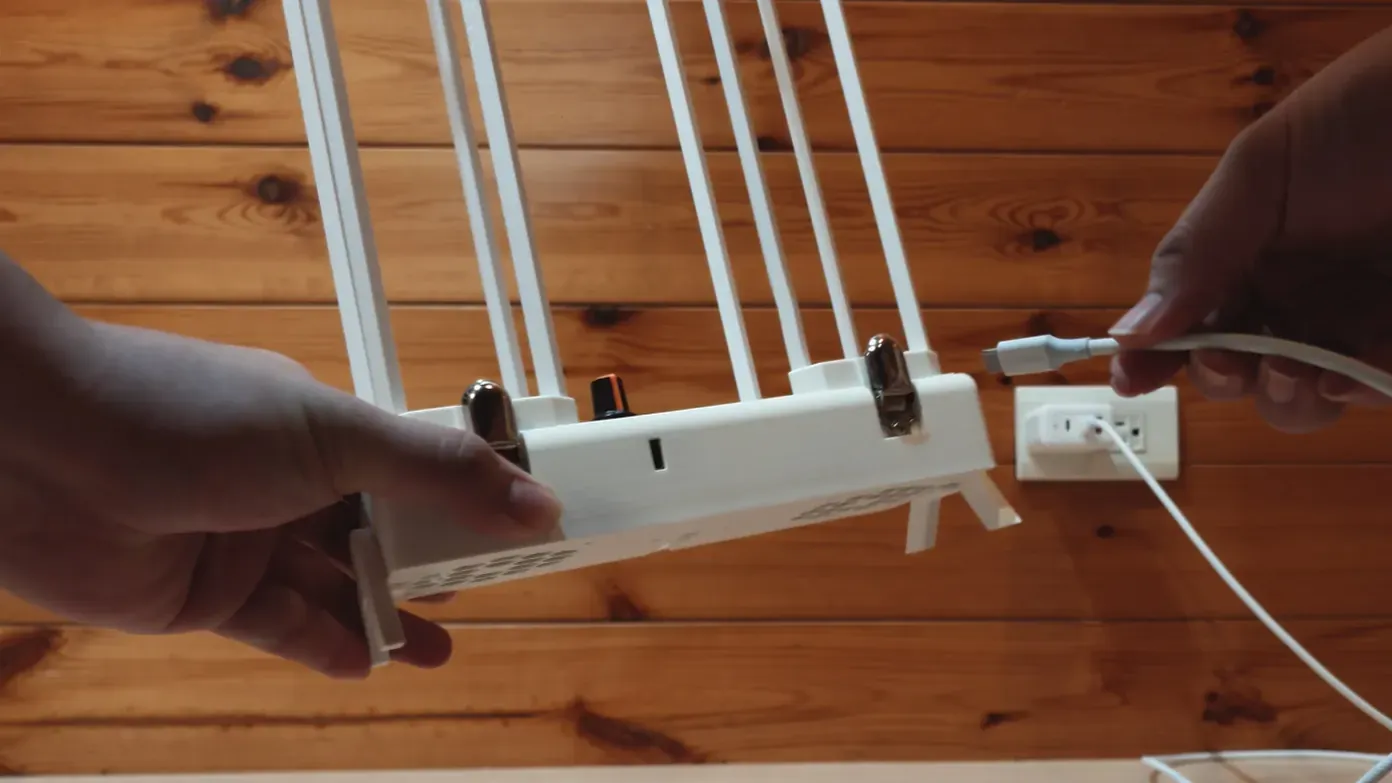
Check that power is connected. PAWS starts when plugged in.
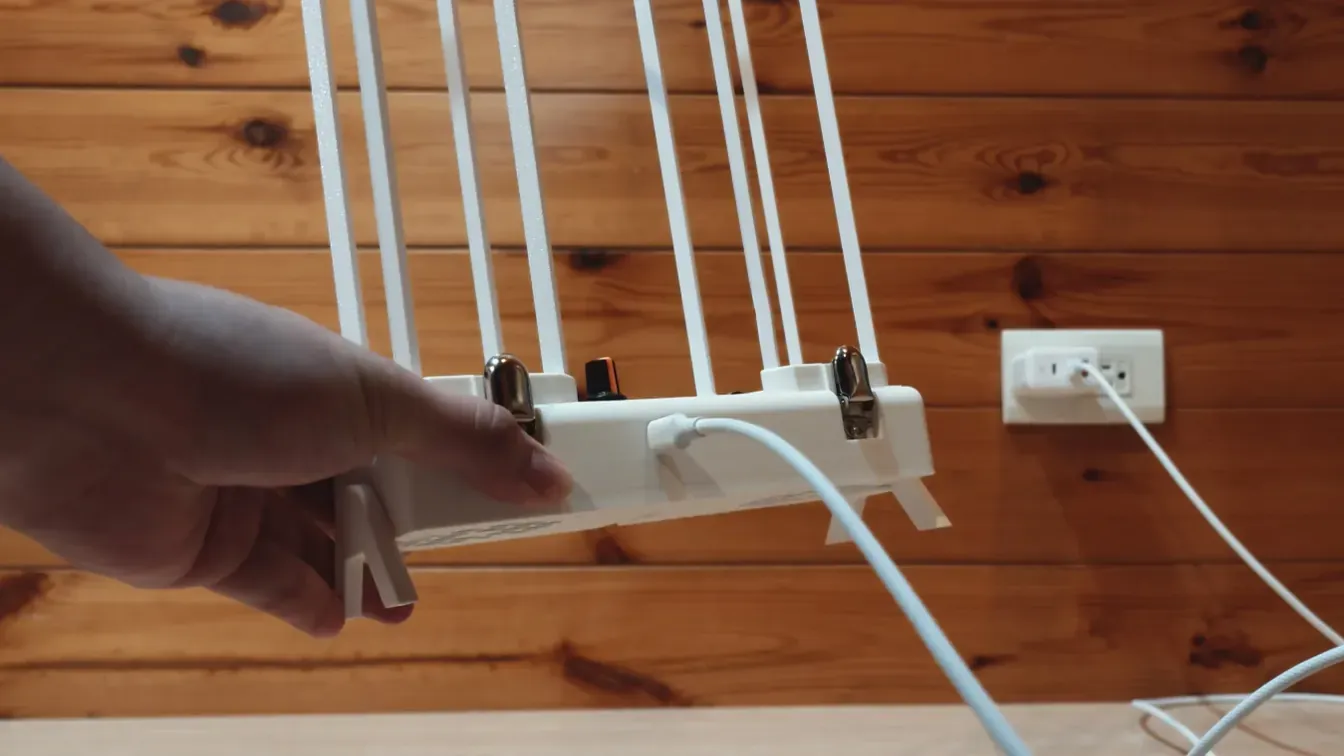
Turn the dial to start either TURBO model.
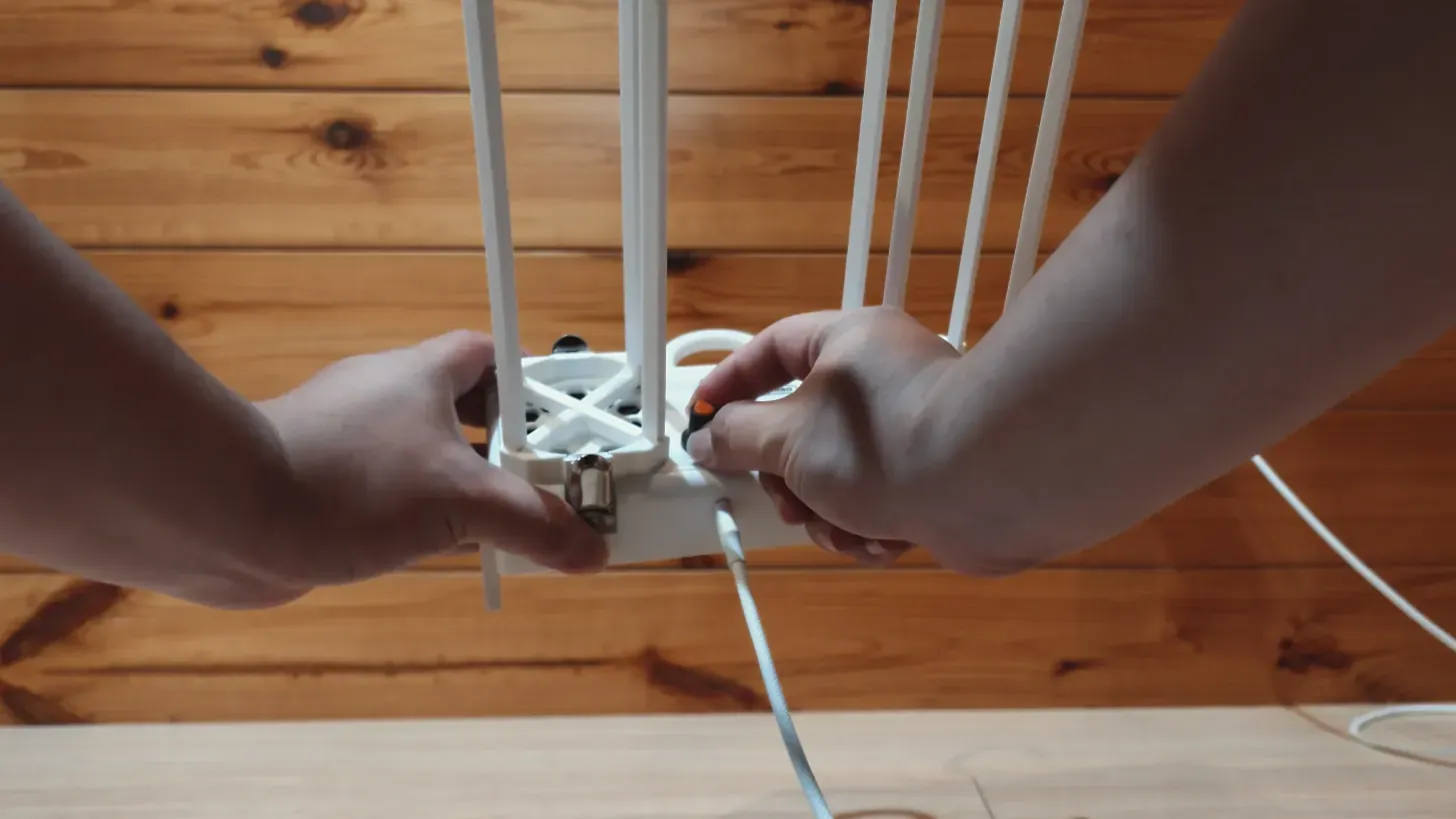
Place a paw opening over a support.
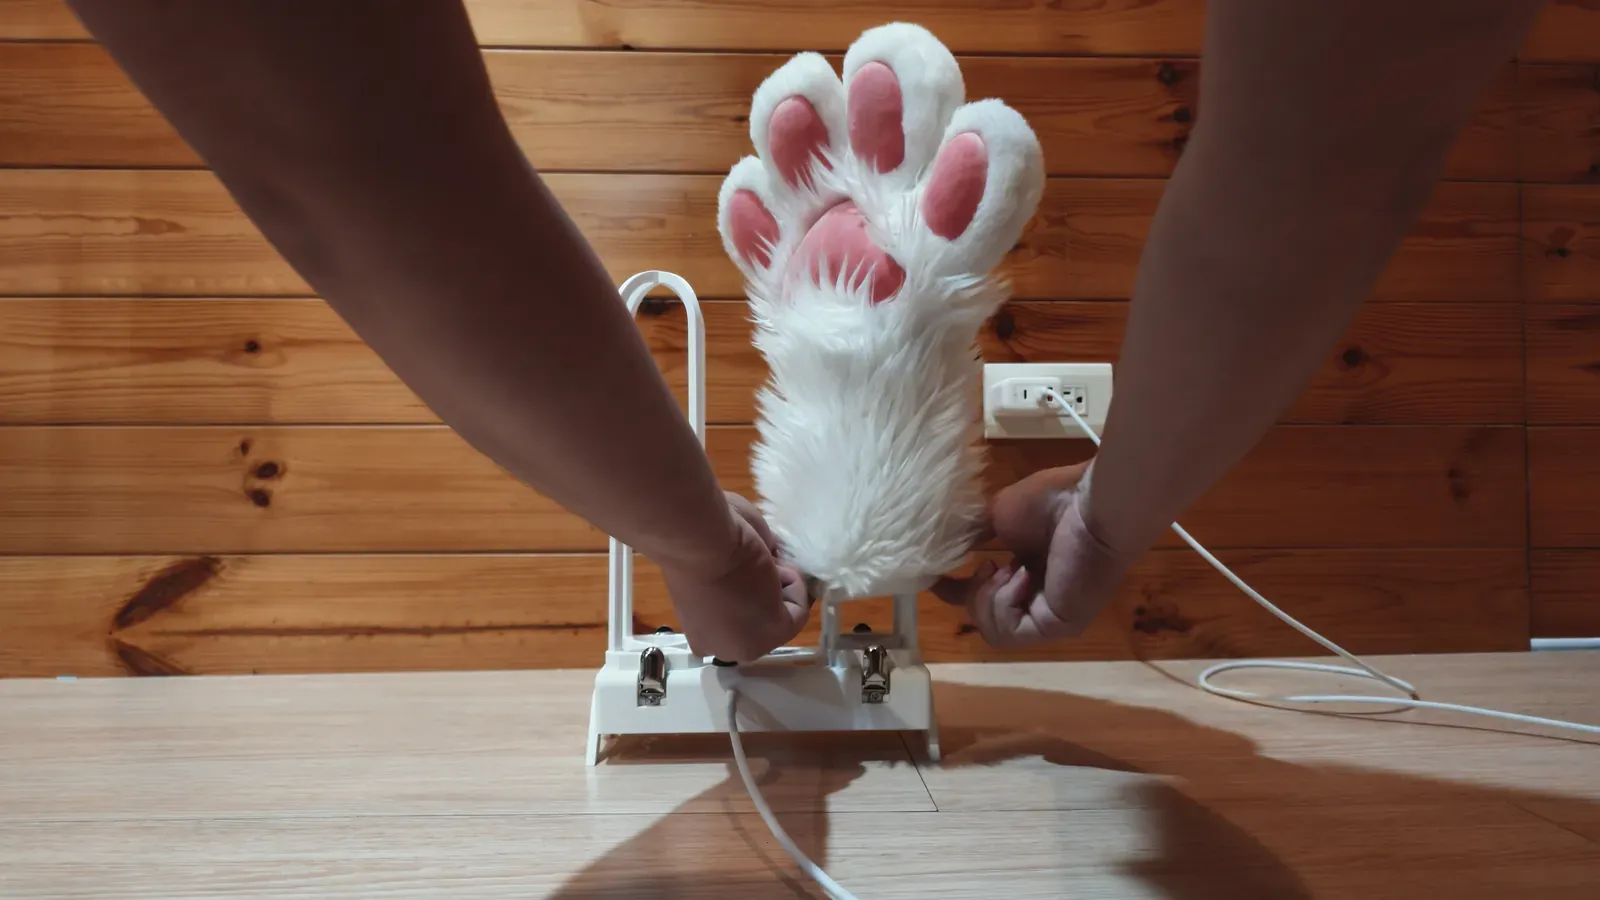
Push it all the way down so air reaches the paw tips.
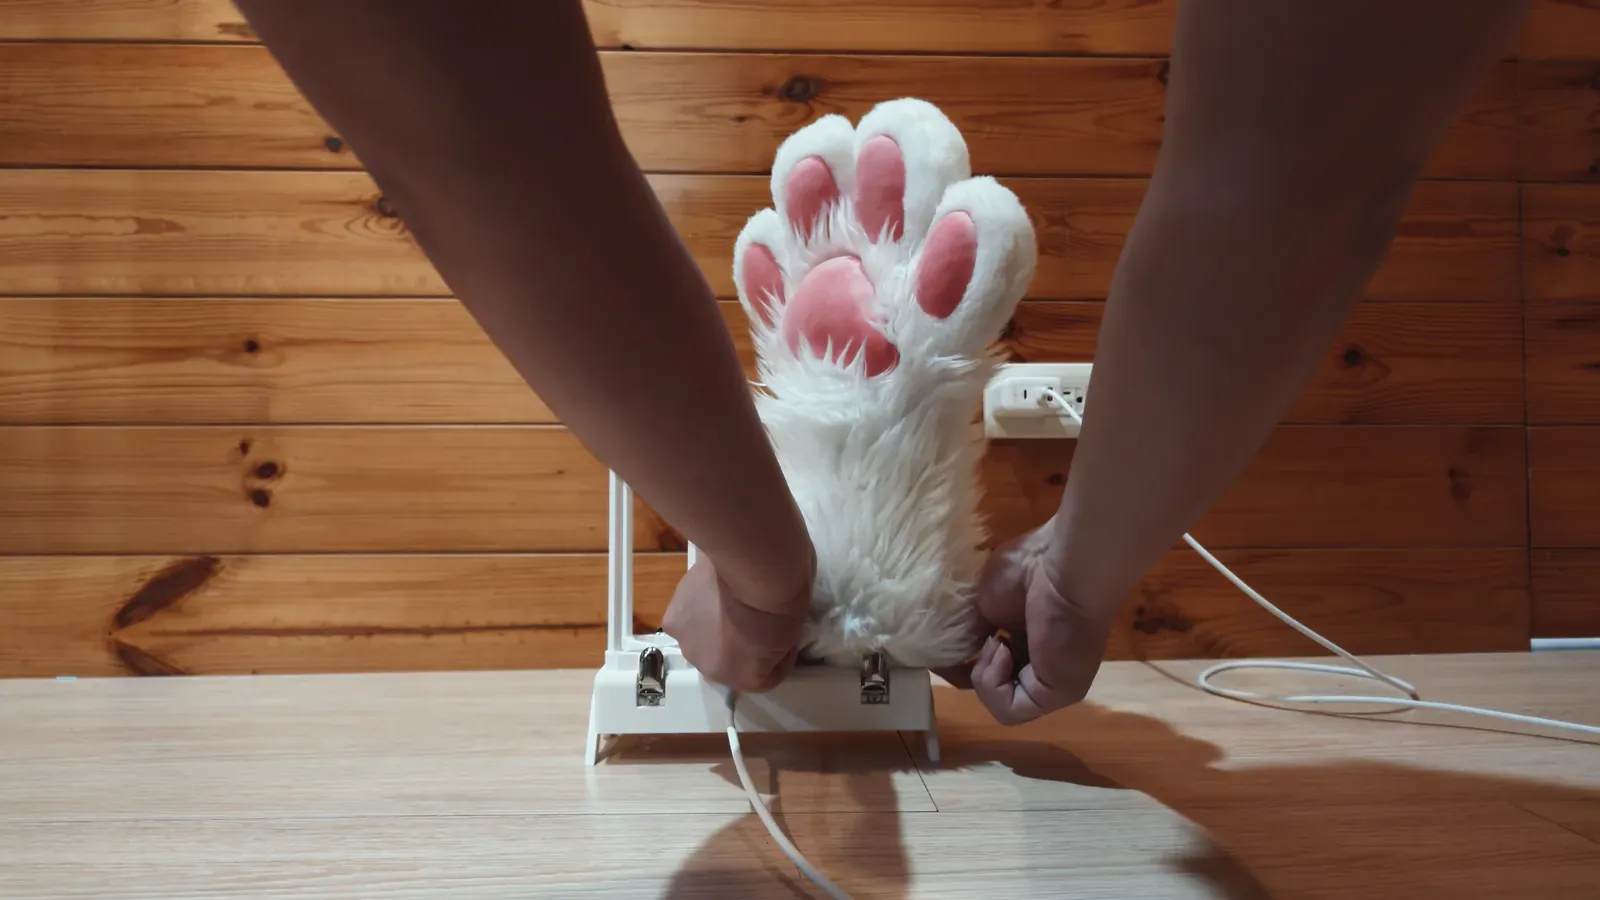
Fit the other paw in the same way.
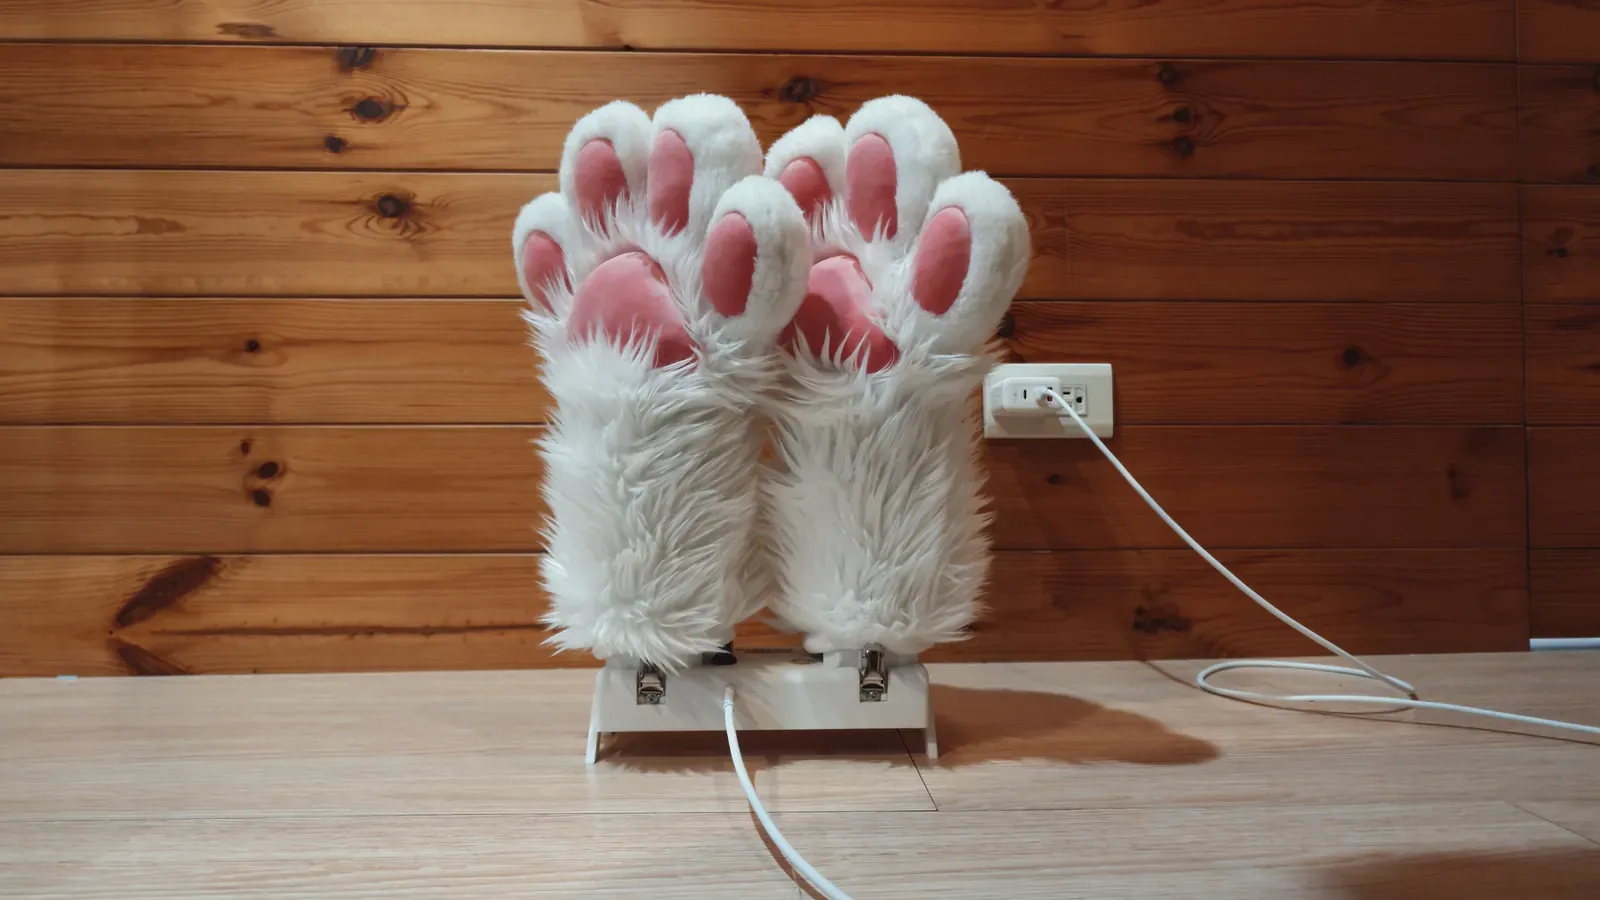
Hanger use
This section applies only to PAWS and standard PAWS TURBO.
Open the hook and hang the unit
Turn the unit over and find the folded hook.
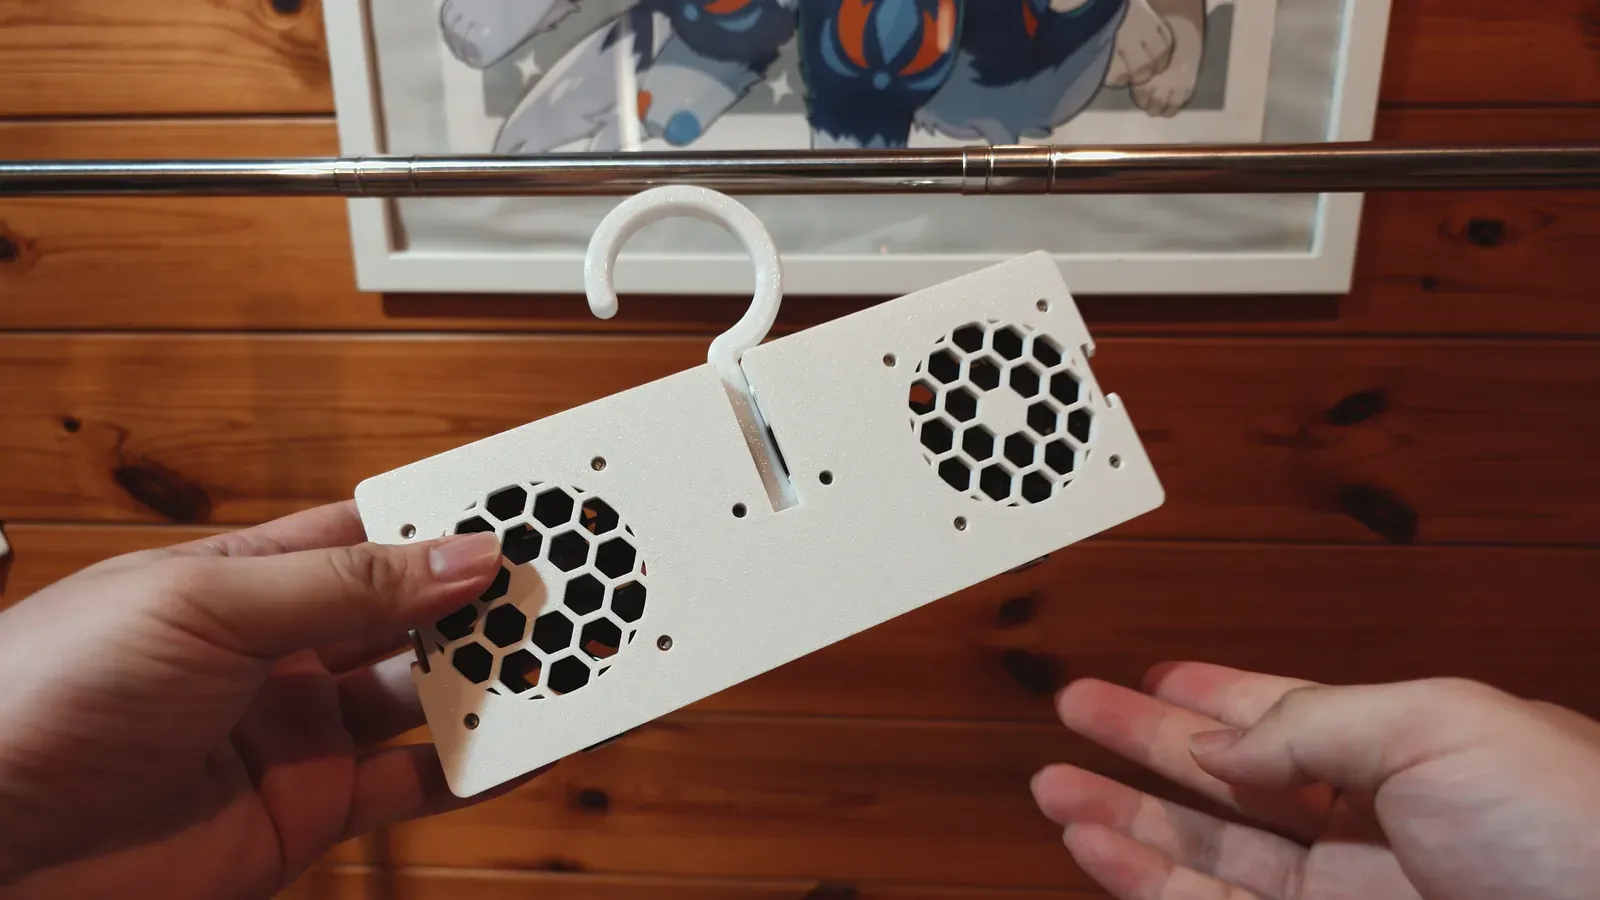
Pull up the hook on the back.
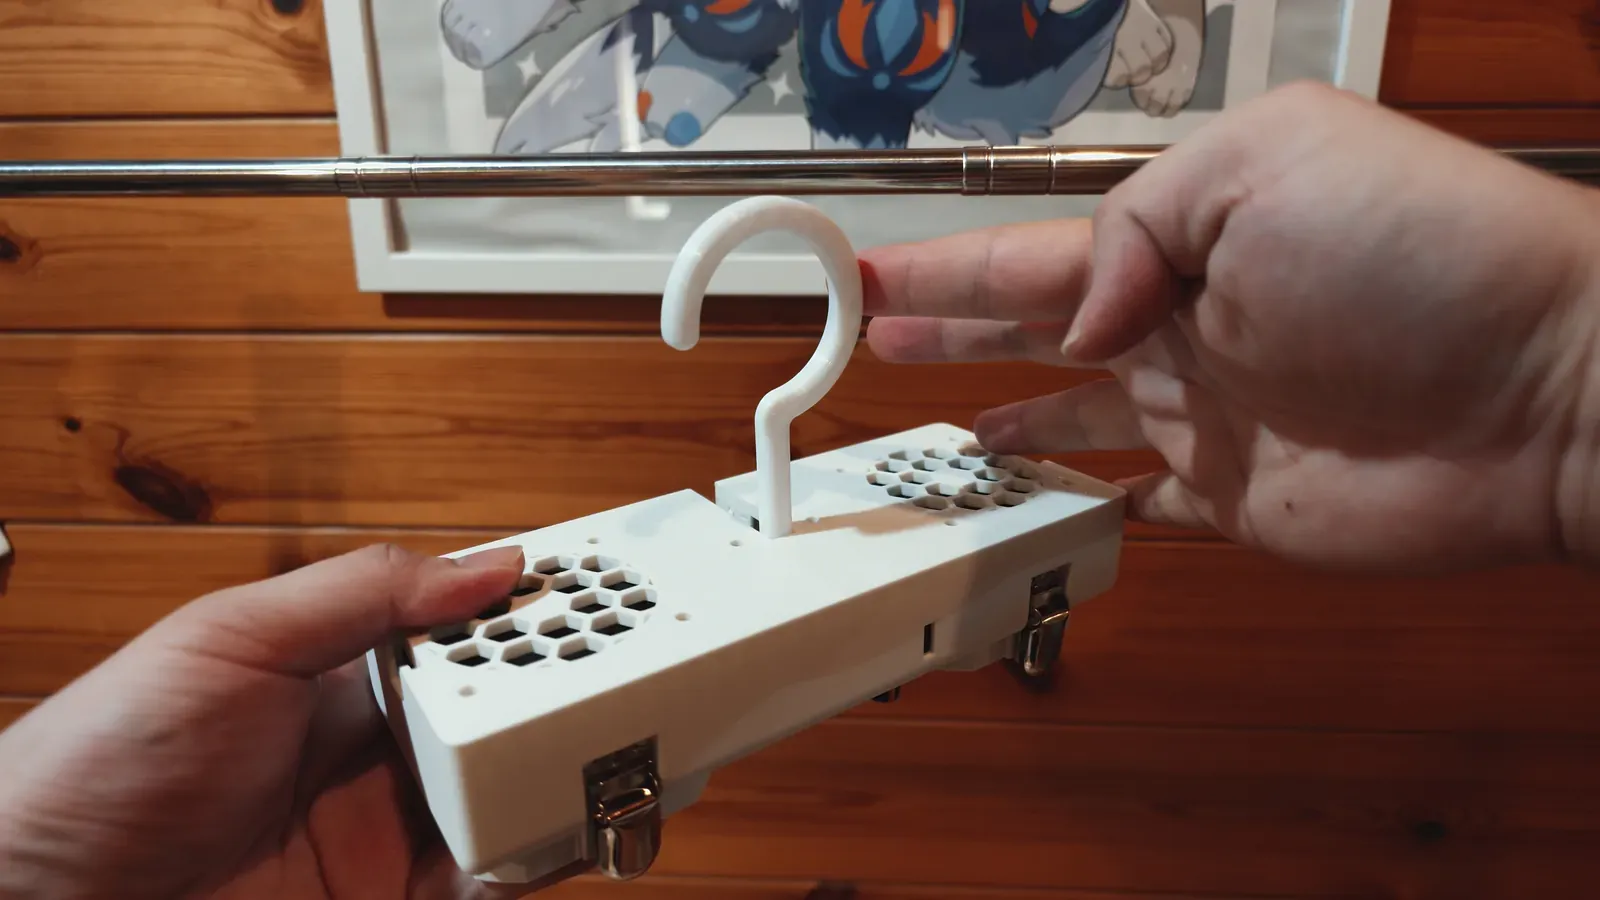
Hang the unit on a clothes hanger.
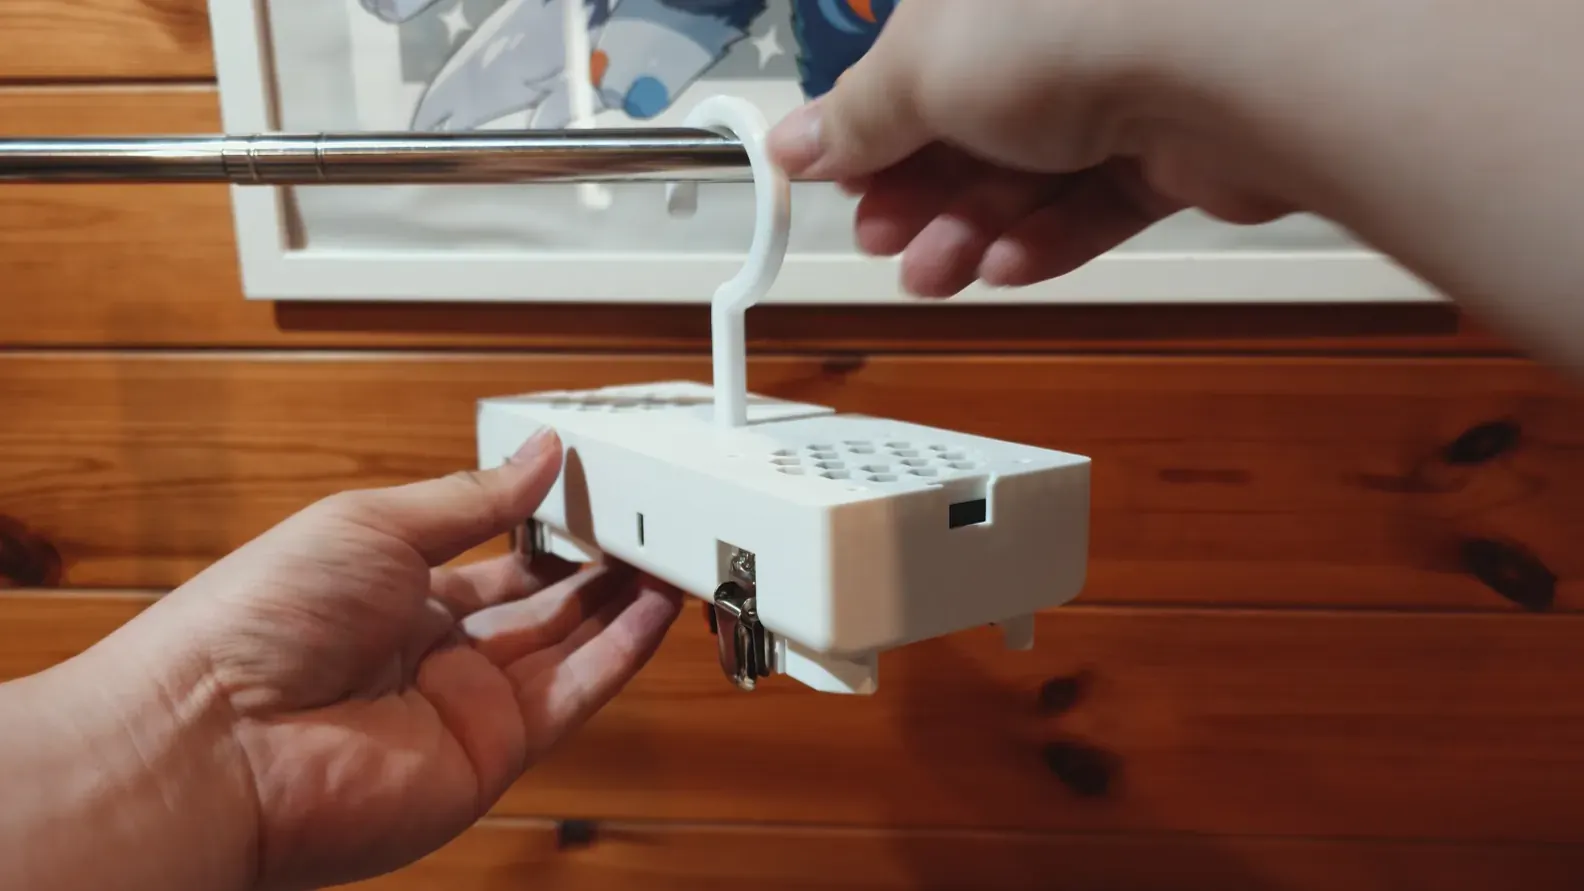
Clip the paws
The unit has four metal paw clips.
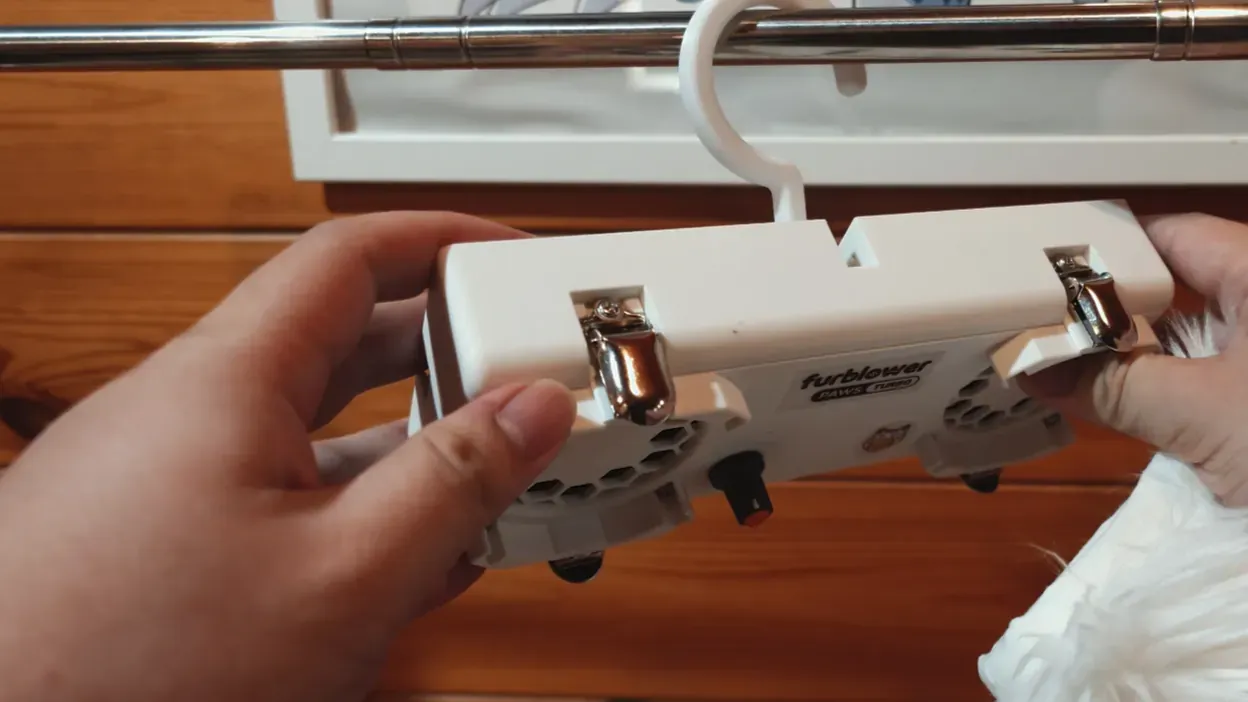
Lift a metal tab to unlock a clip.
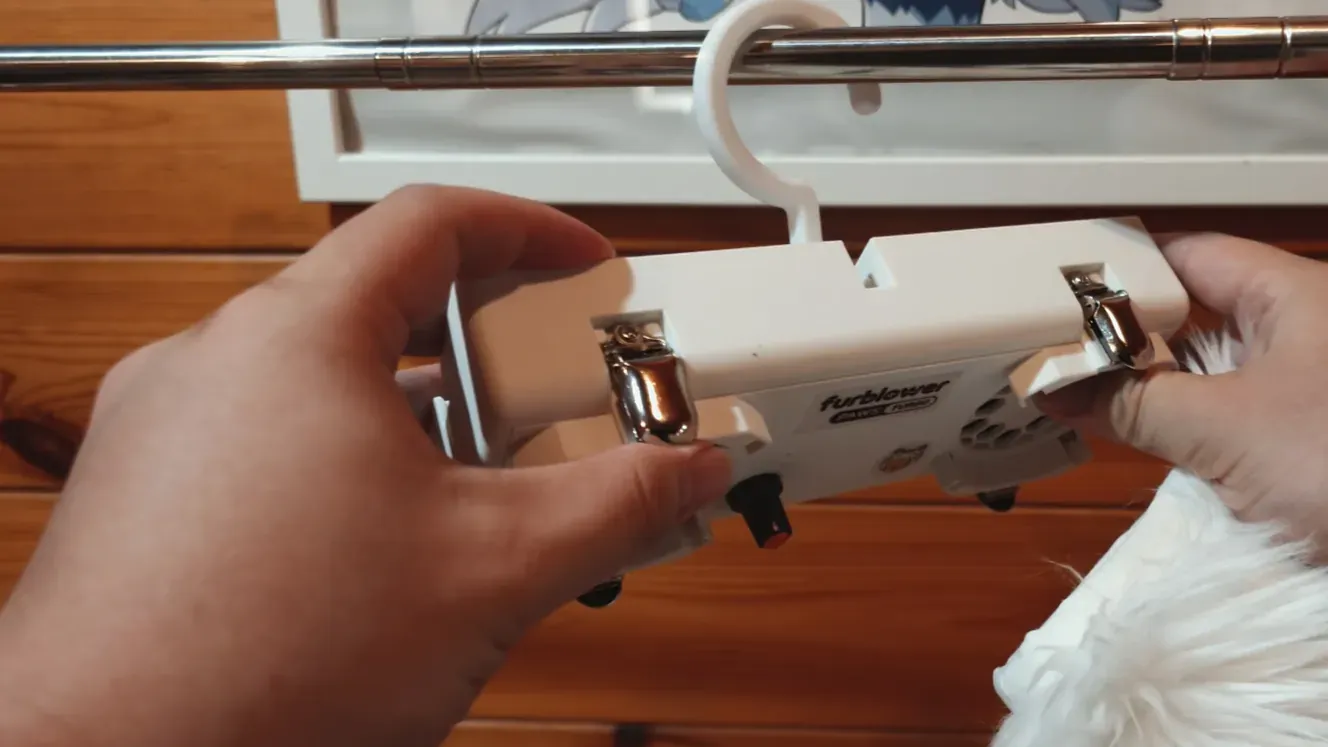
Check that the clip is open.
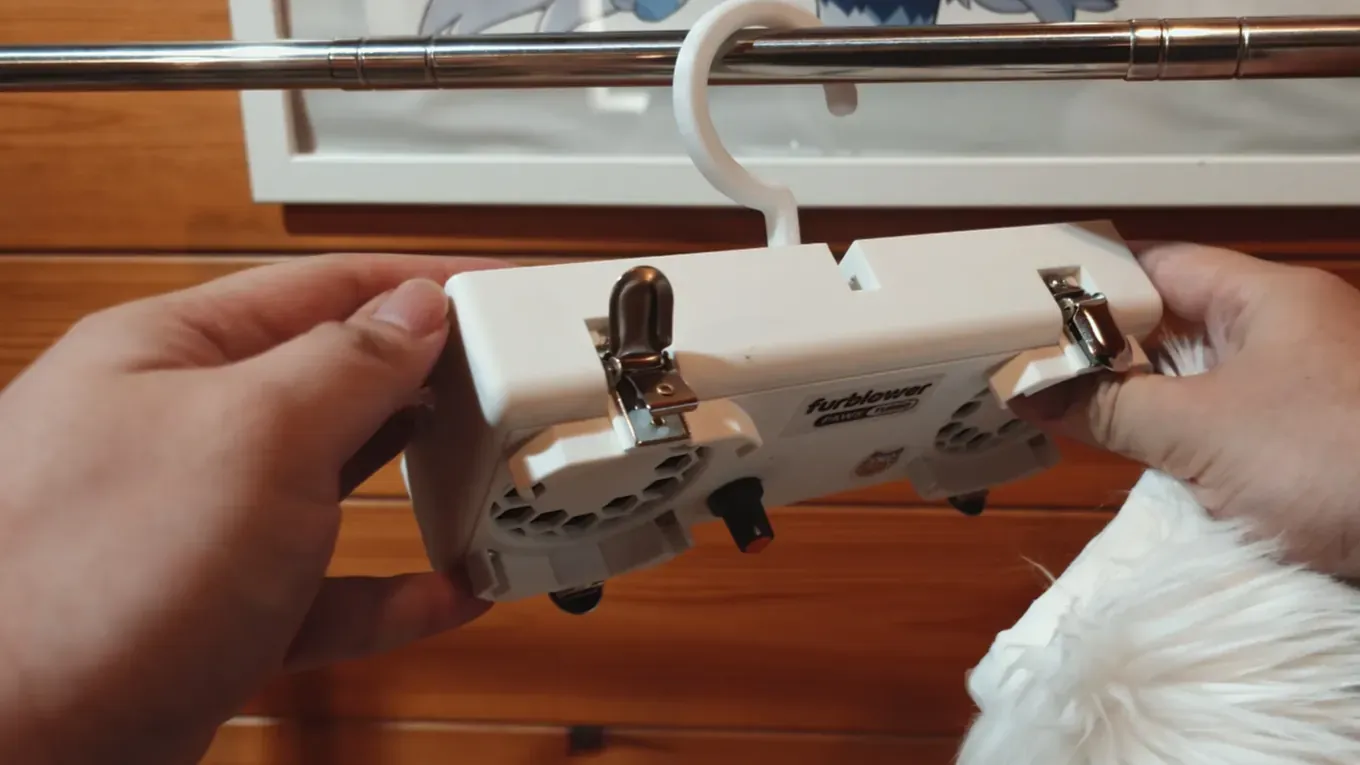
Place the fabric edge of a paw inside.
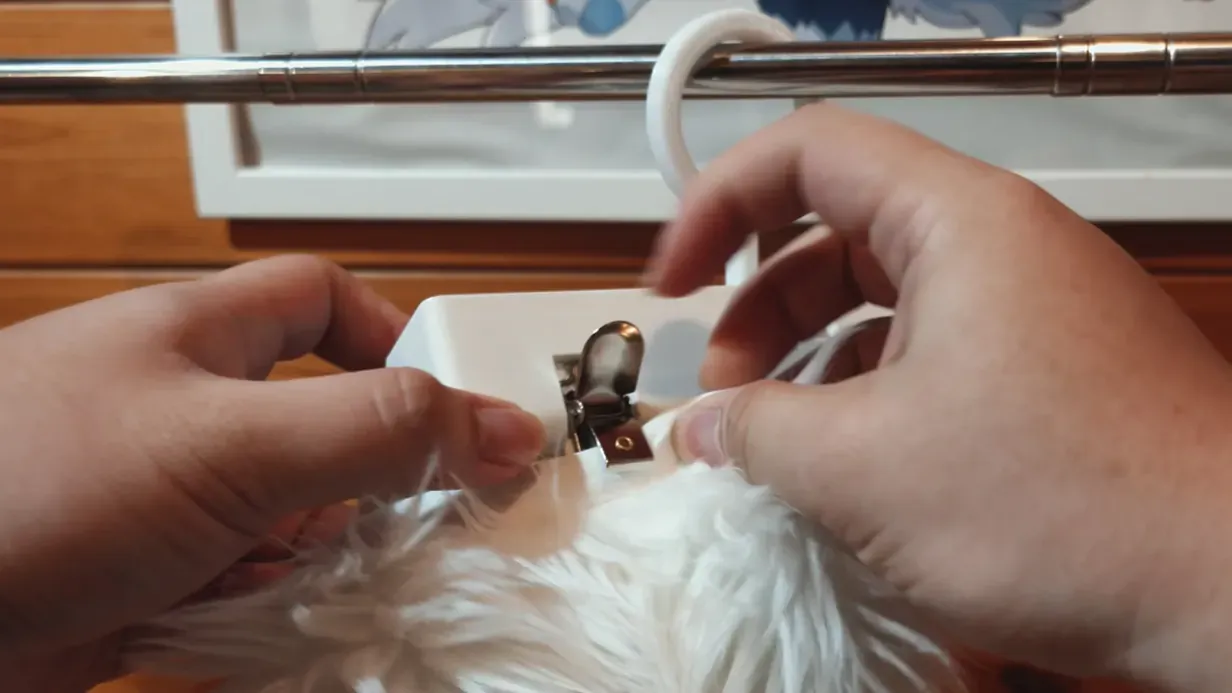
Push the tab down to lock it.
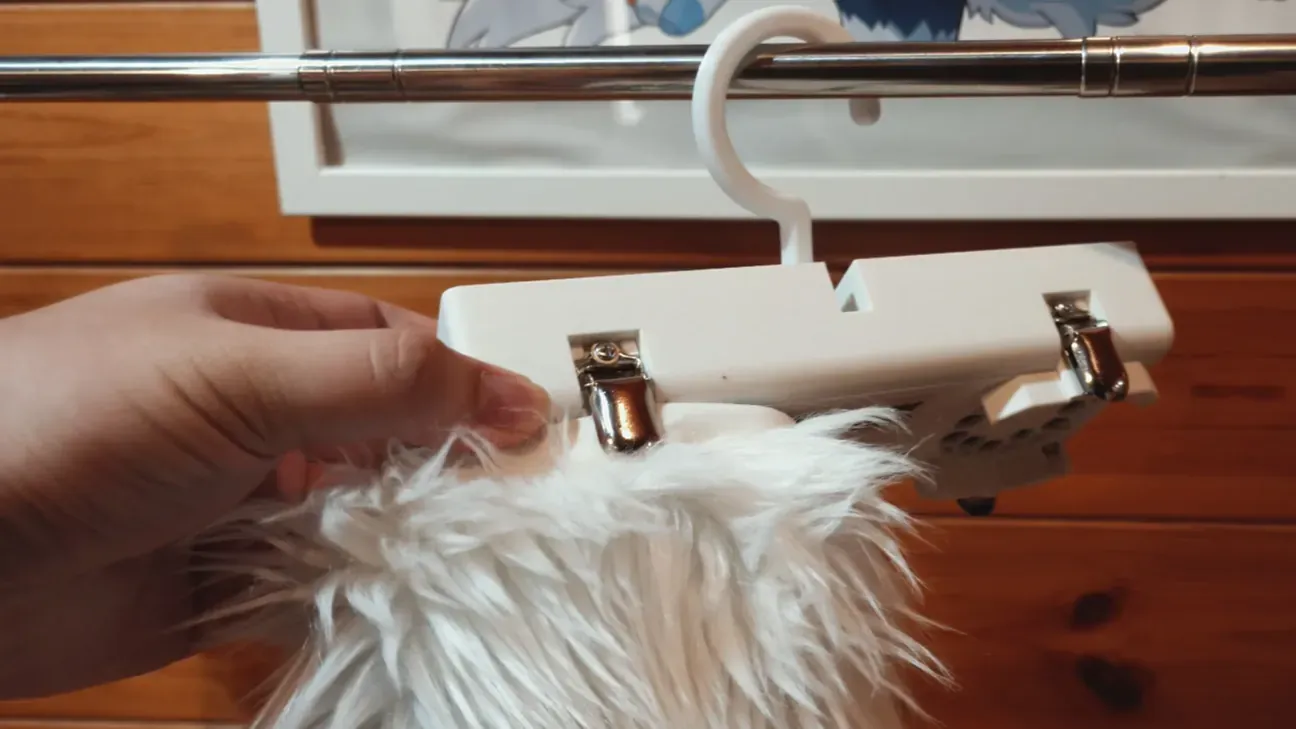
Secure the paw on the other side in the same way.
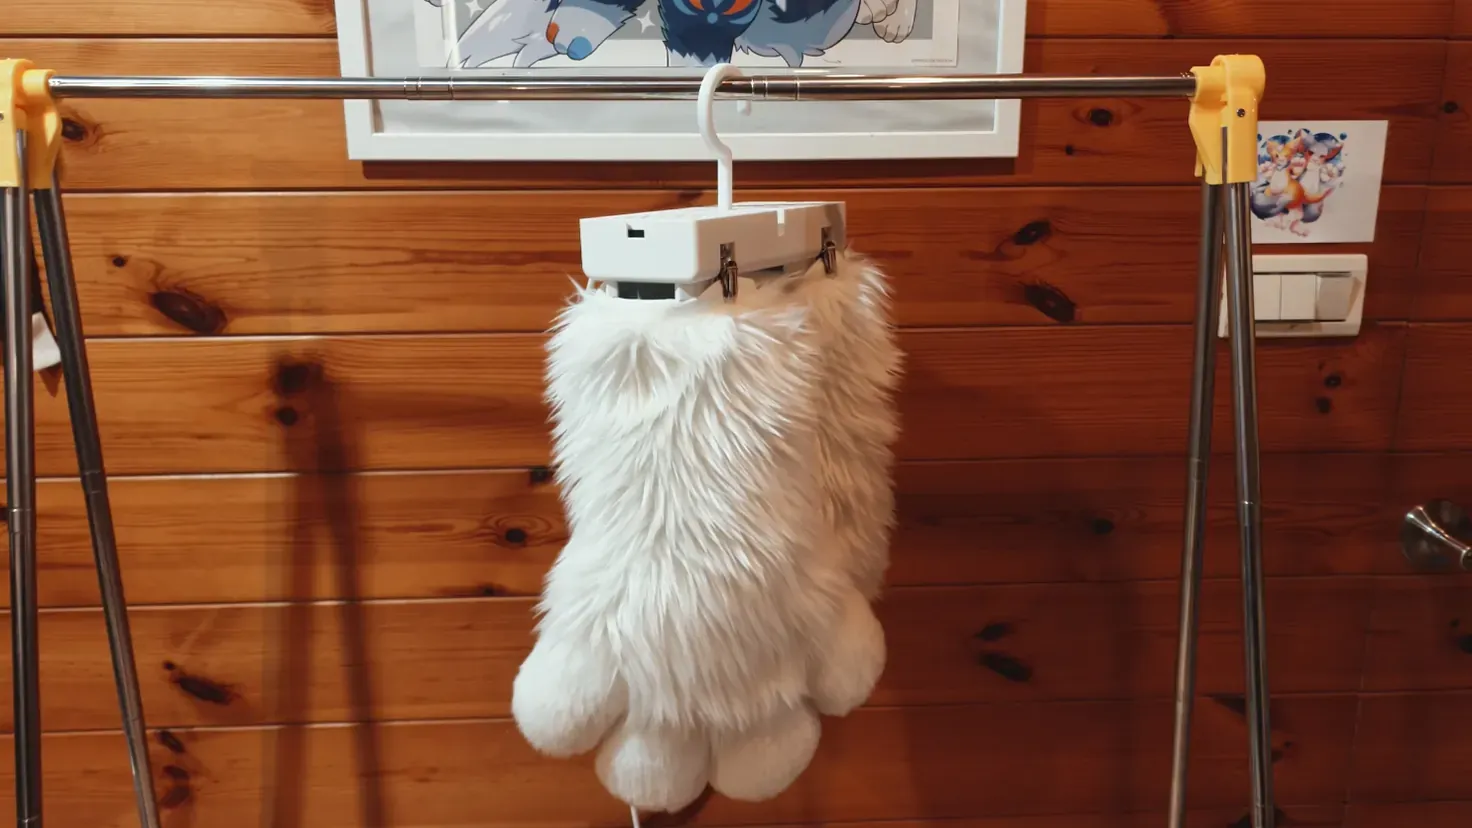
Connect power
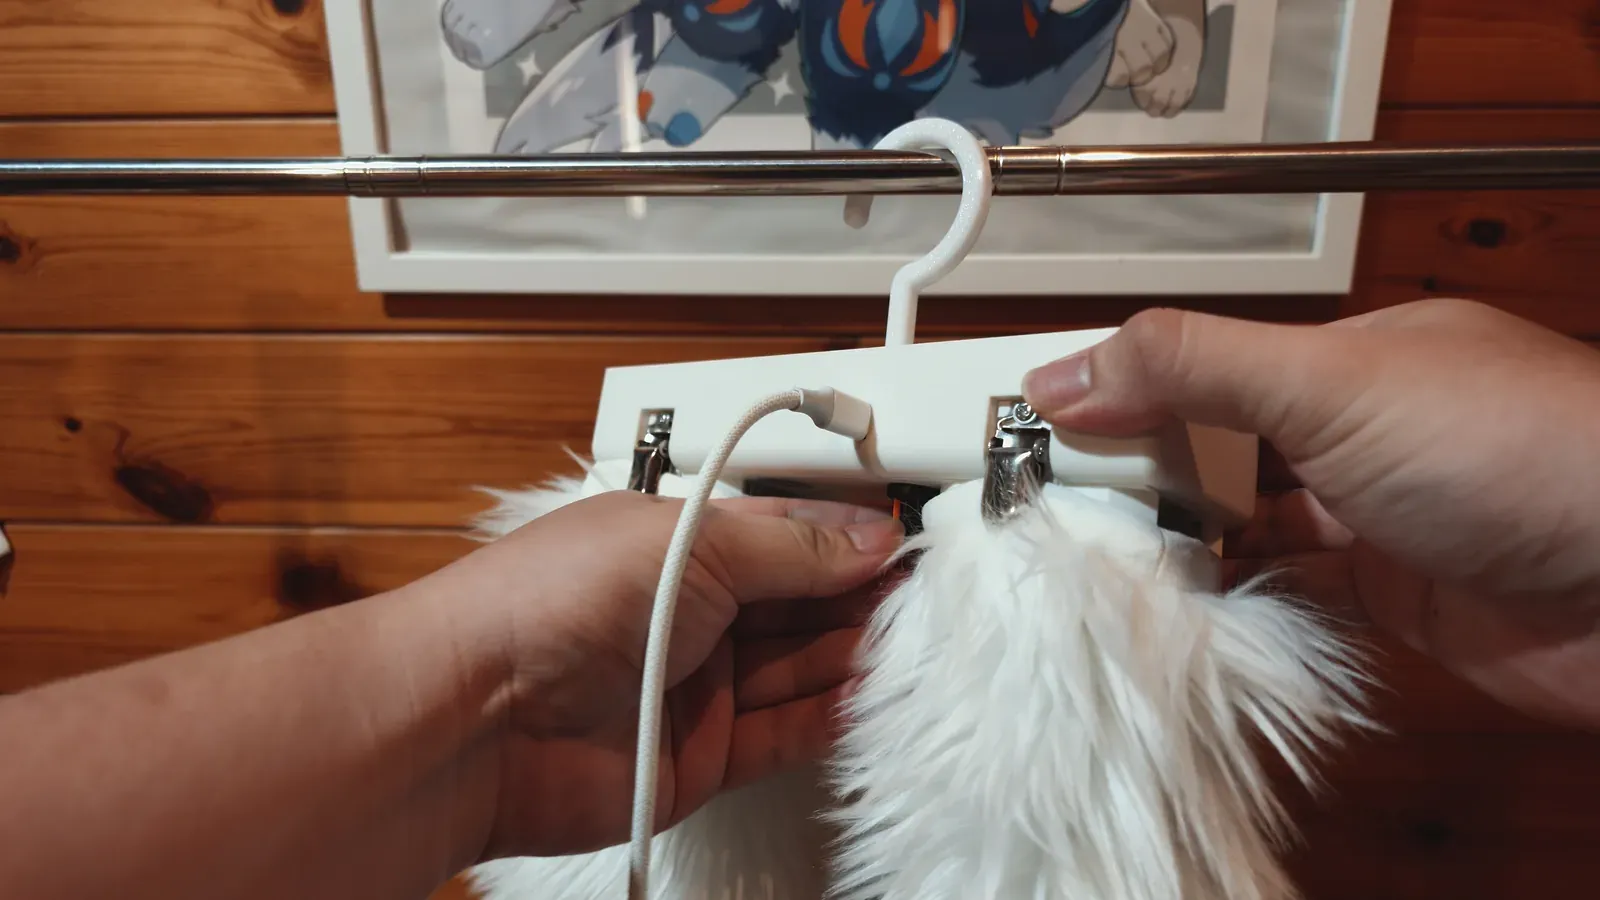
After securing the paws, choose a supply using the table above.
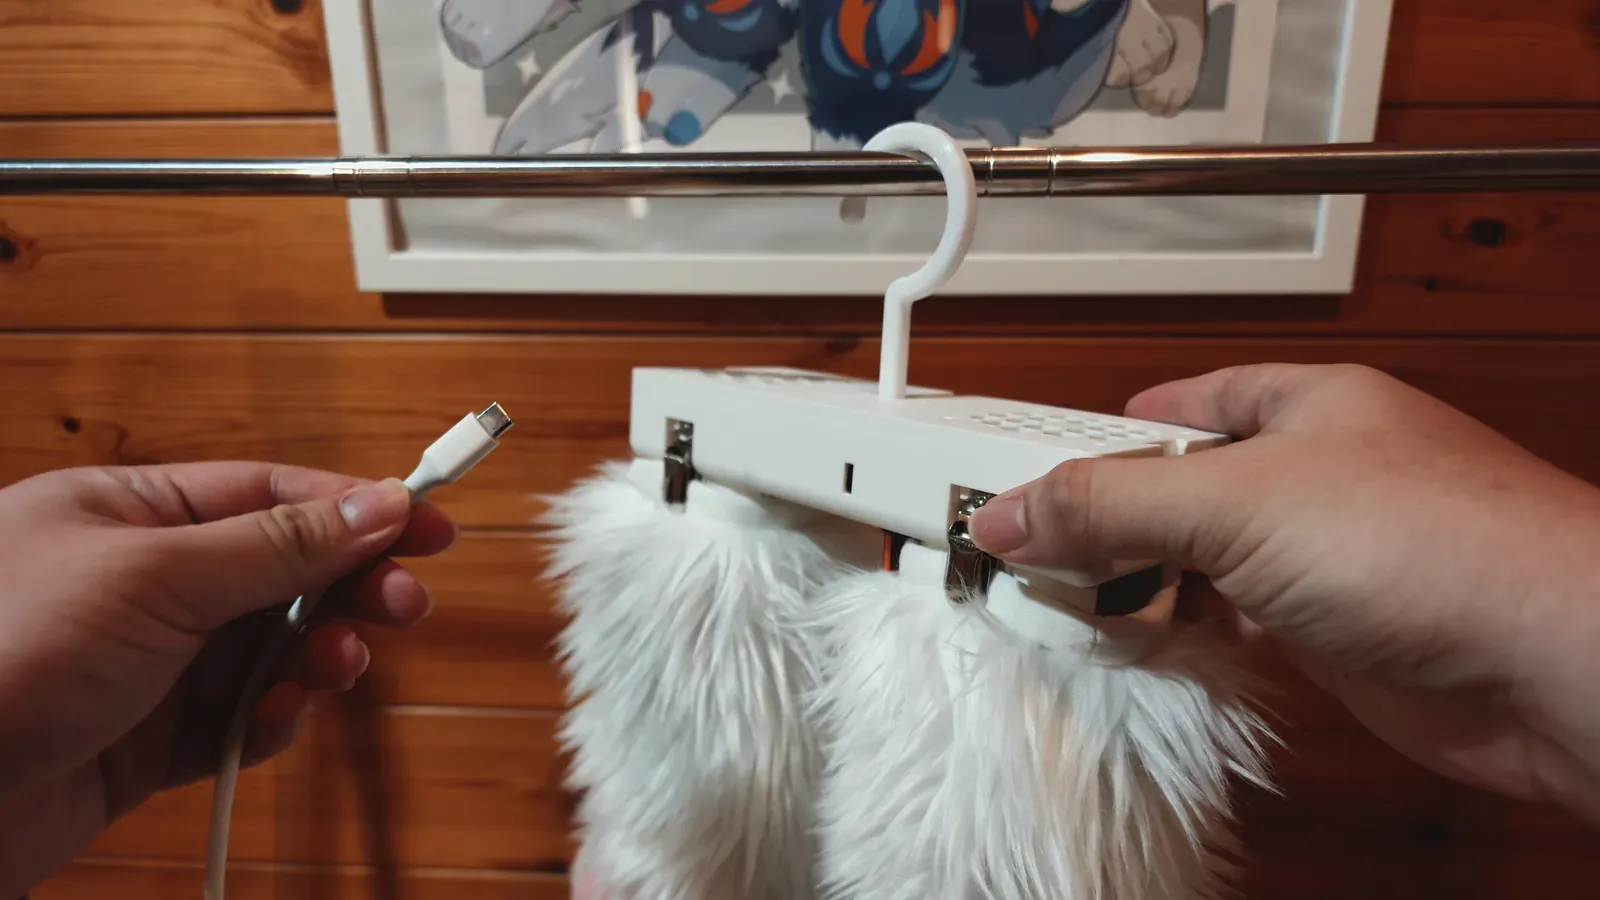
PAWS starts when USB-C power is connected.
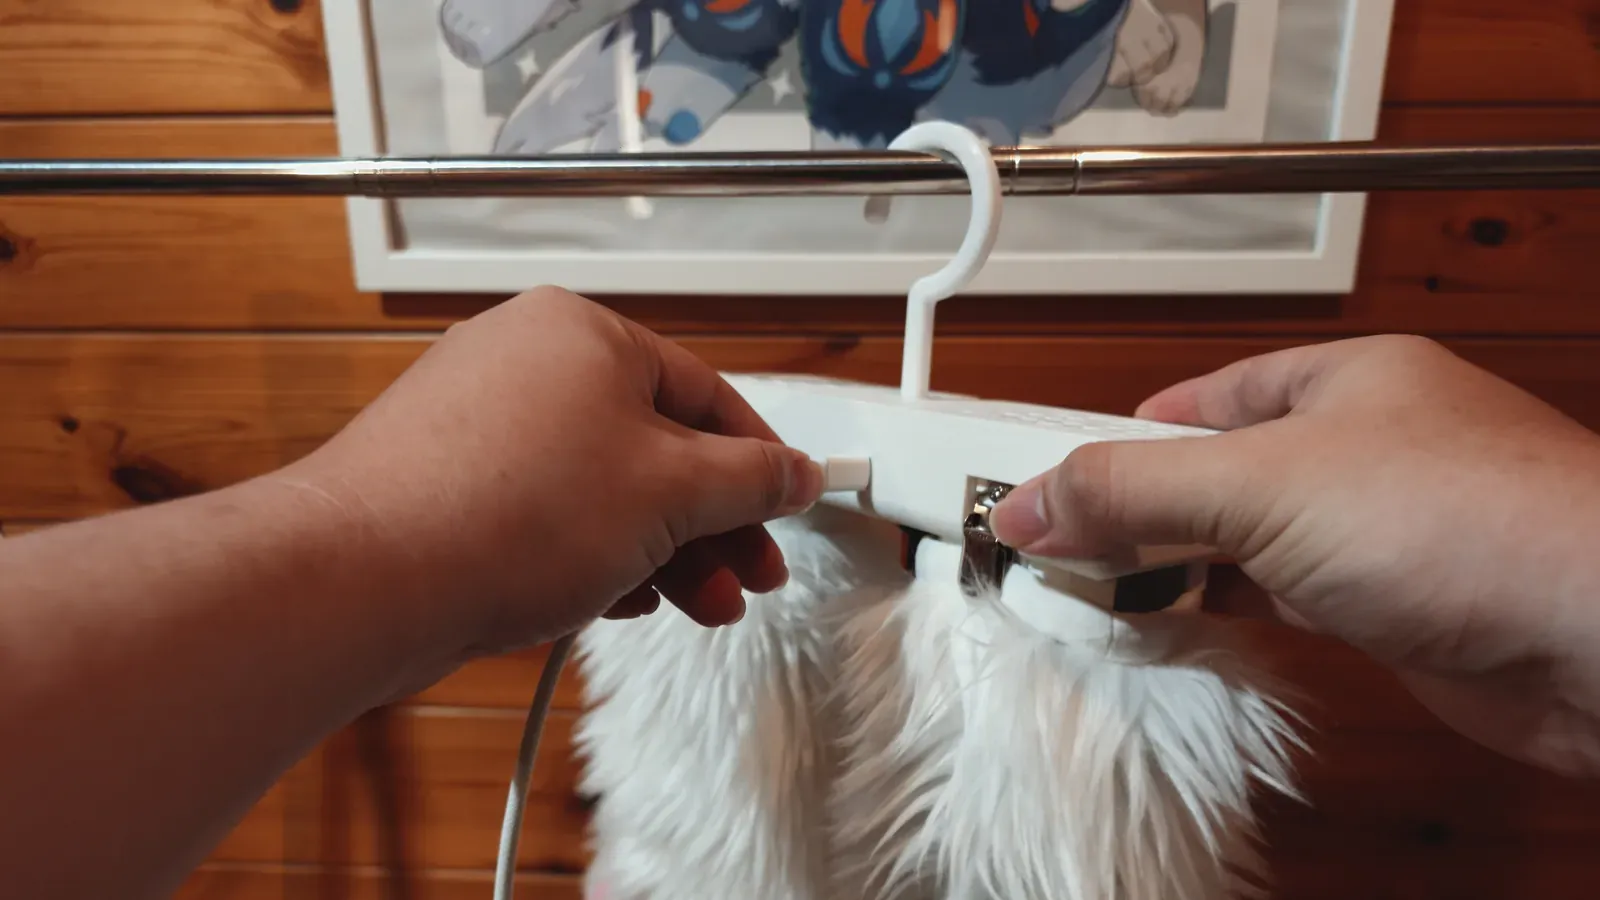
For PAWS TURBO, turn the dial to start and adjust the fans.
Duct use
This section applies only to PAWS TURBO Duct. Its plastic duct clips replace the metal paw clips. It comes with two reversible ducts and cannot clip paws while hanging. Disconnect power before assembly.
Release the duct clips
The white plastic pieces on the sides are duct clips.
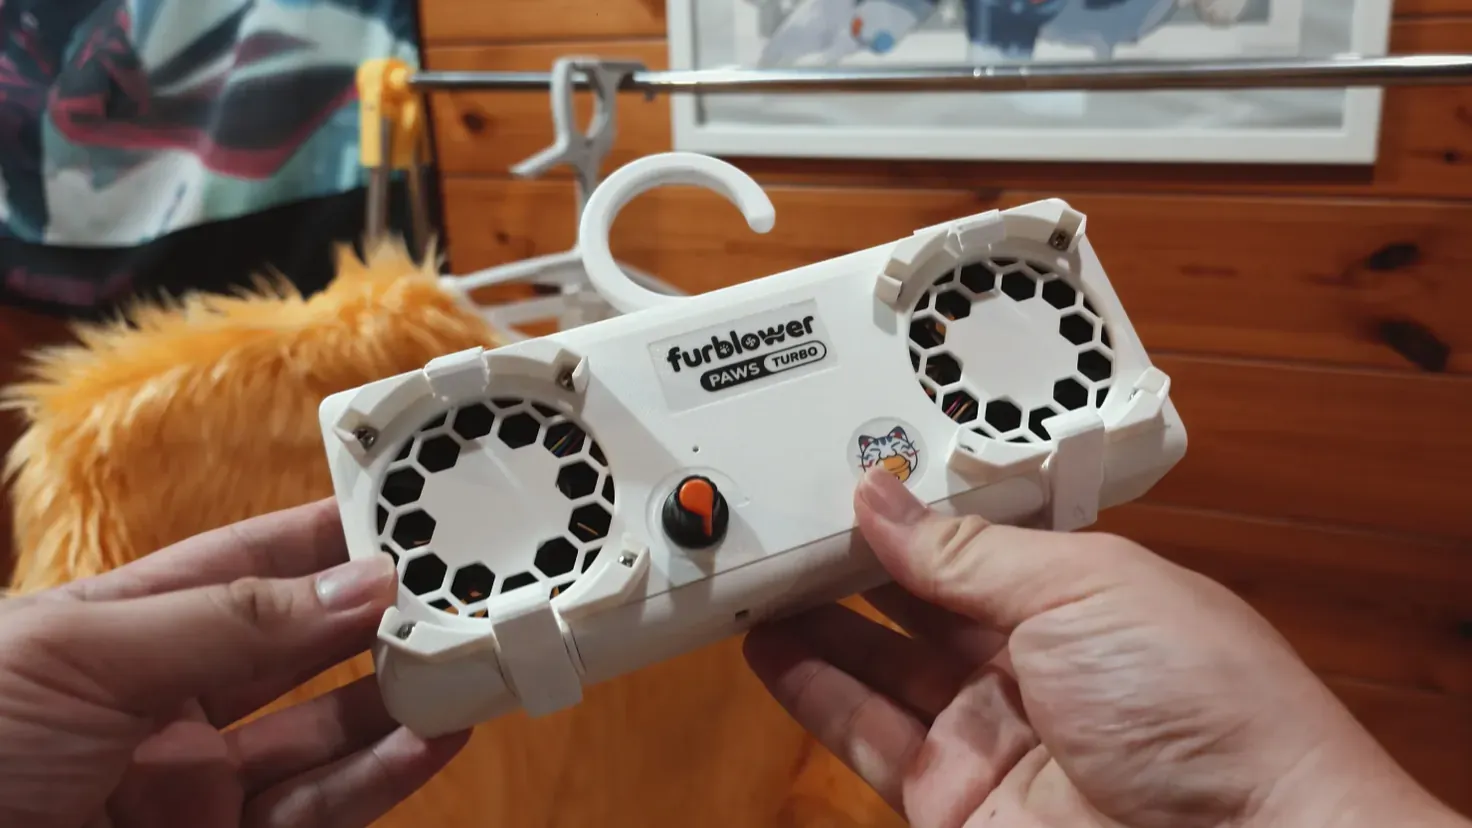
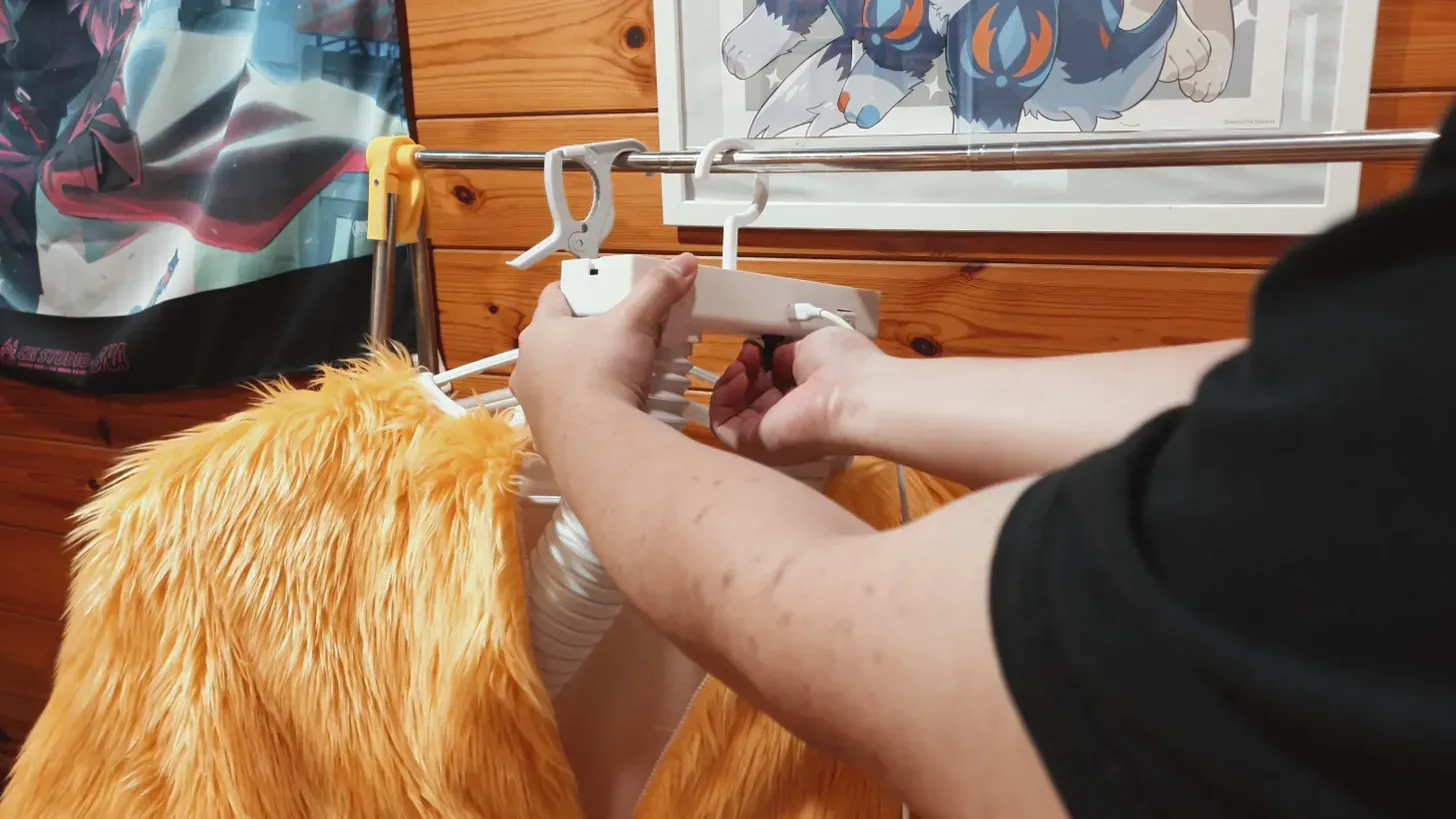
Press the plastic piece down with both hands to release it. Once a duct is inserted, secure it with the clip.
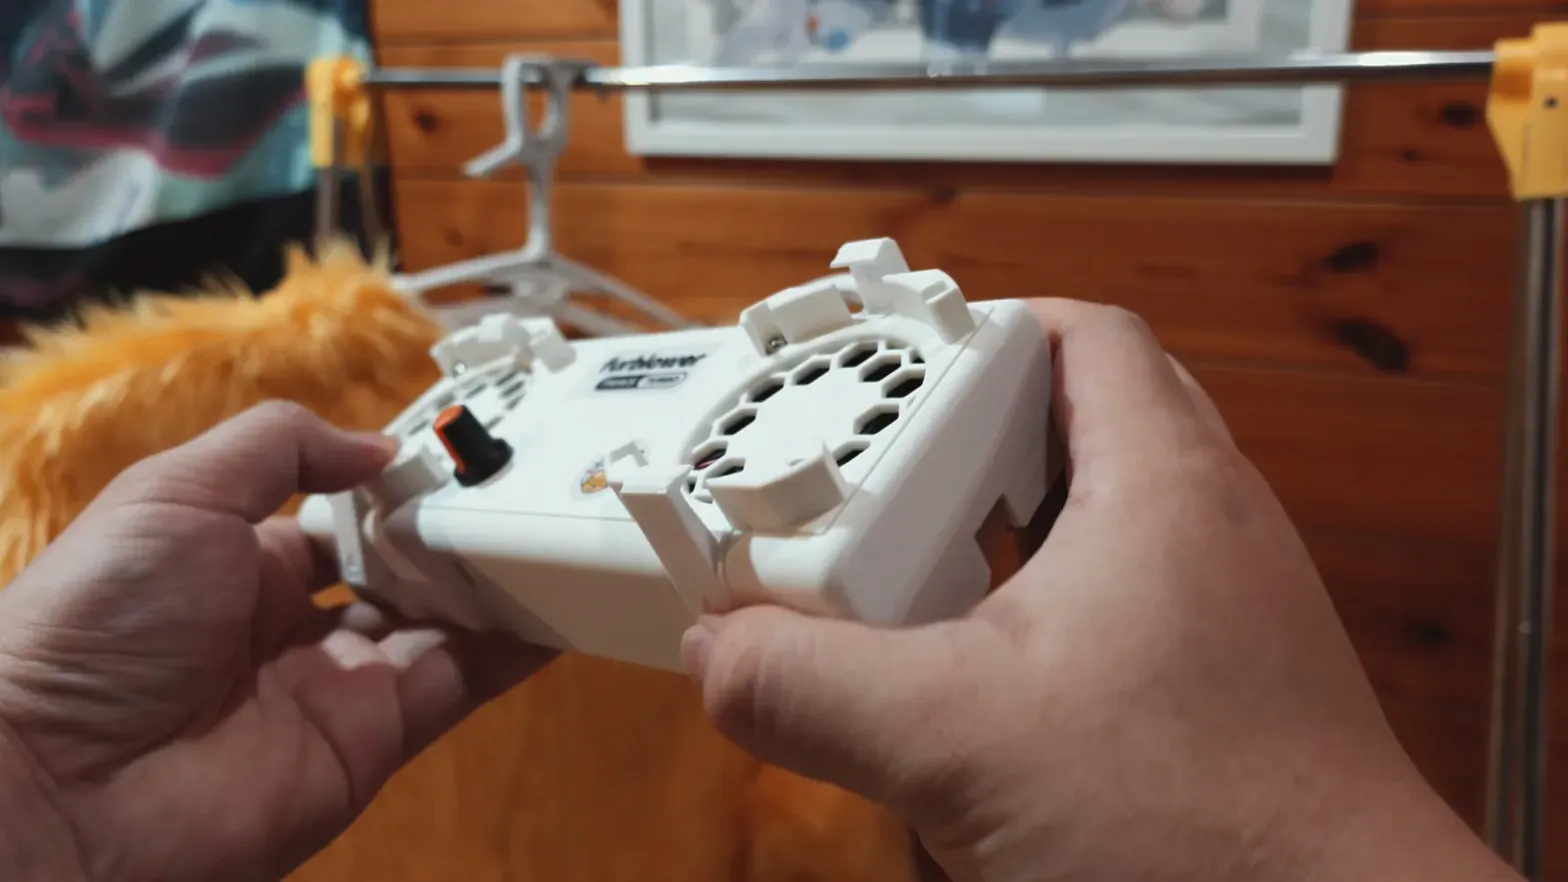
Fit both ducts
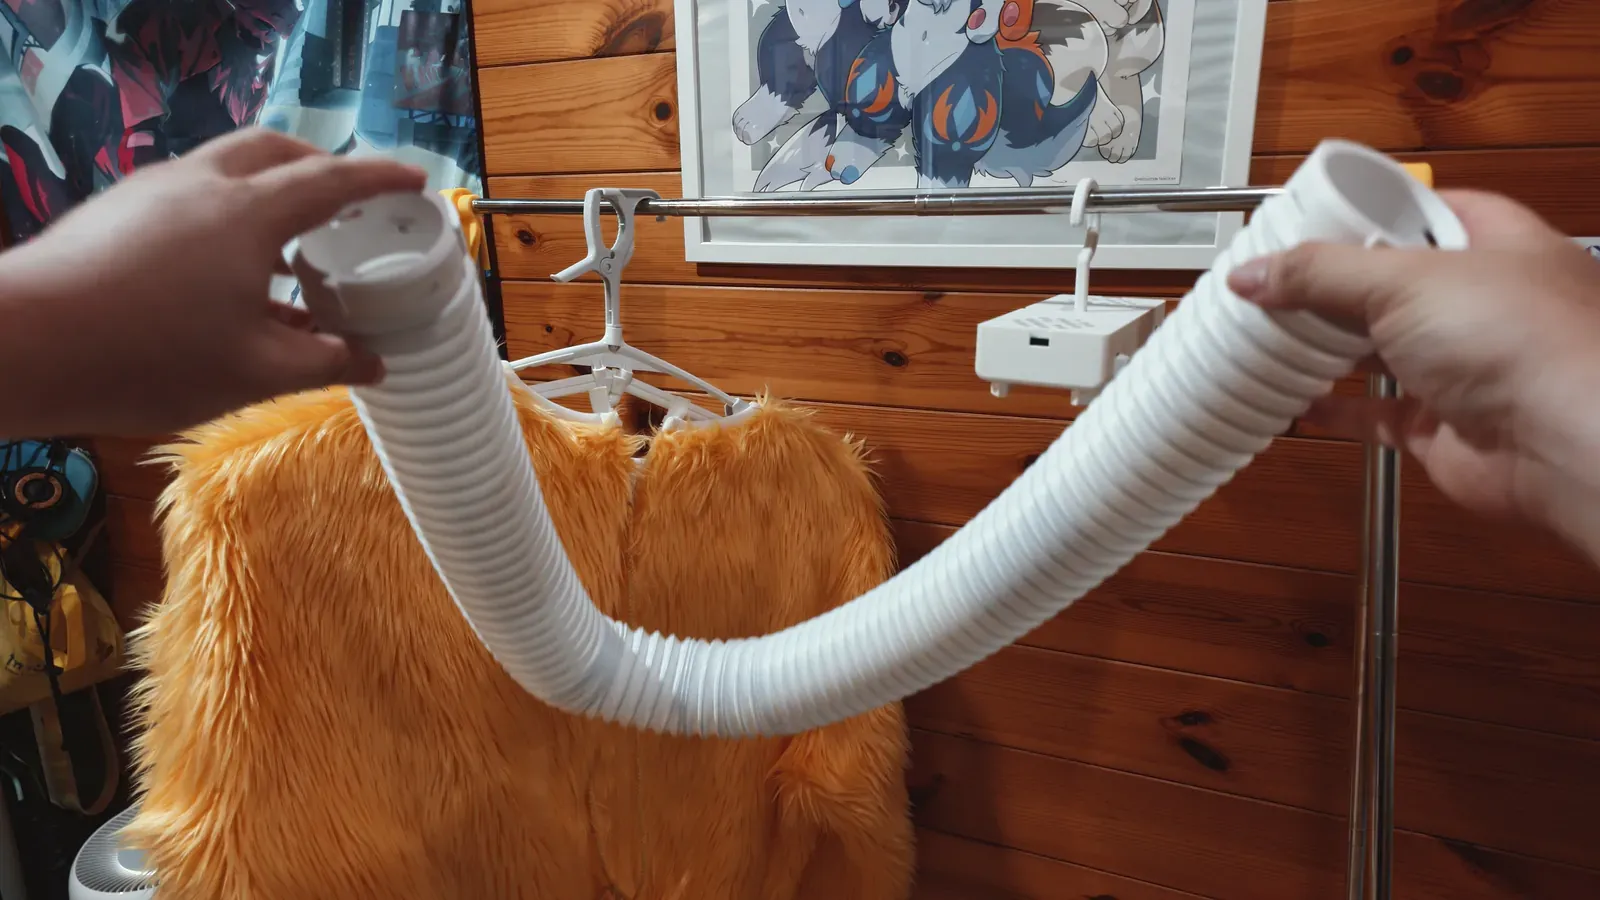
The Duct model includes two reversible ducts. Either end can connect to the unit.
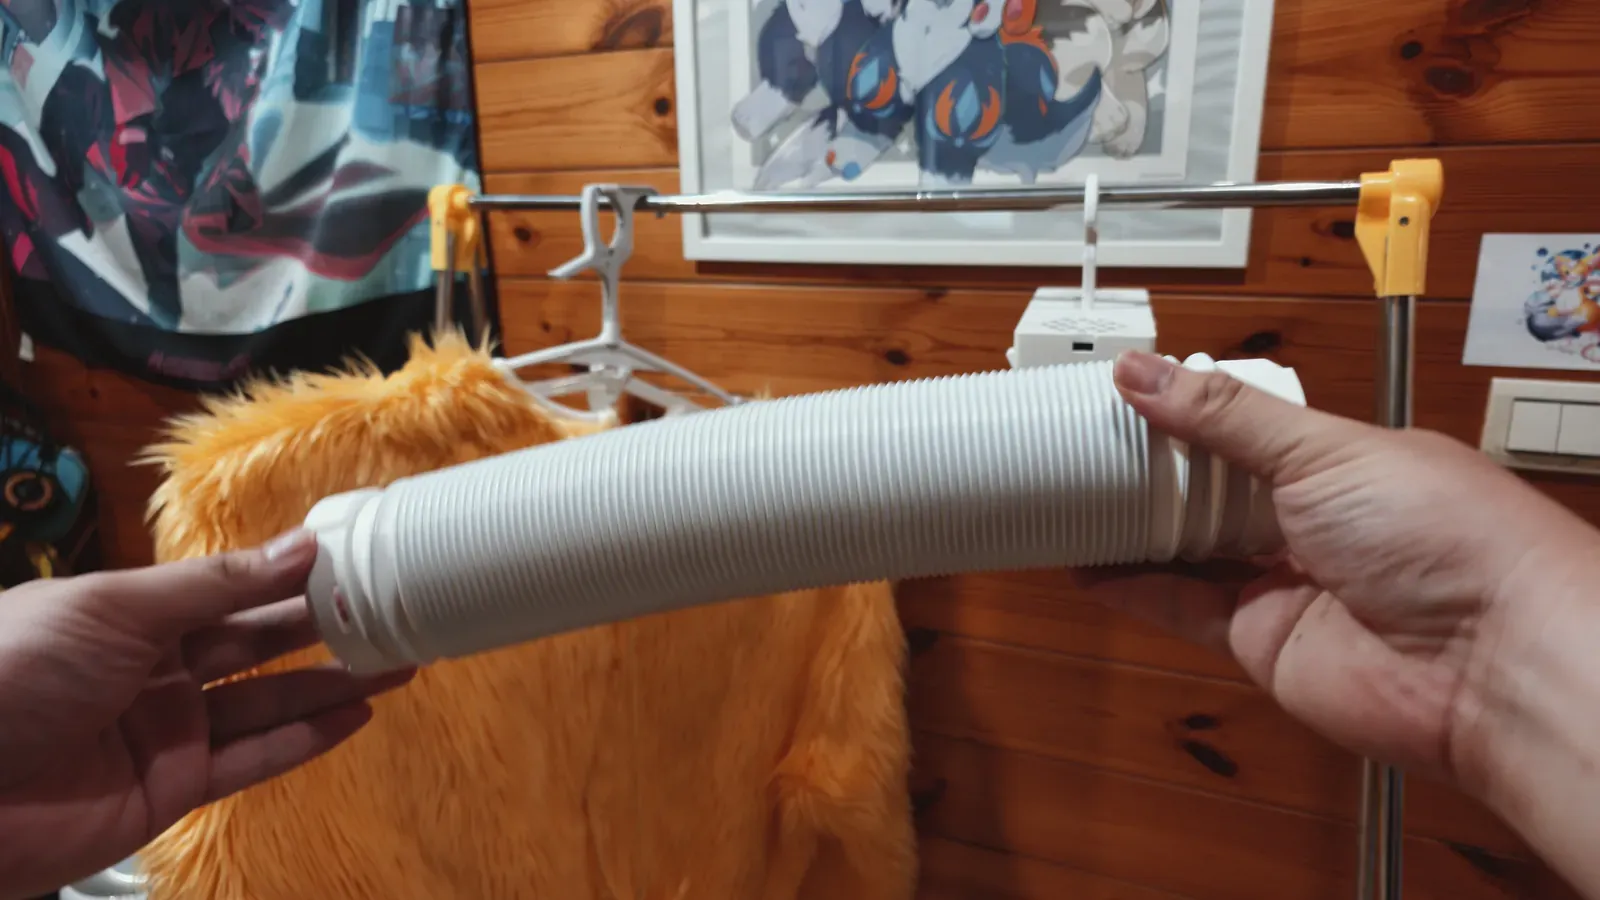
Pull a duct’s ends apart to adjust its length.
Hang the fursuit body, then insert a duct into a sleeve through the long zipper opening.
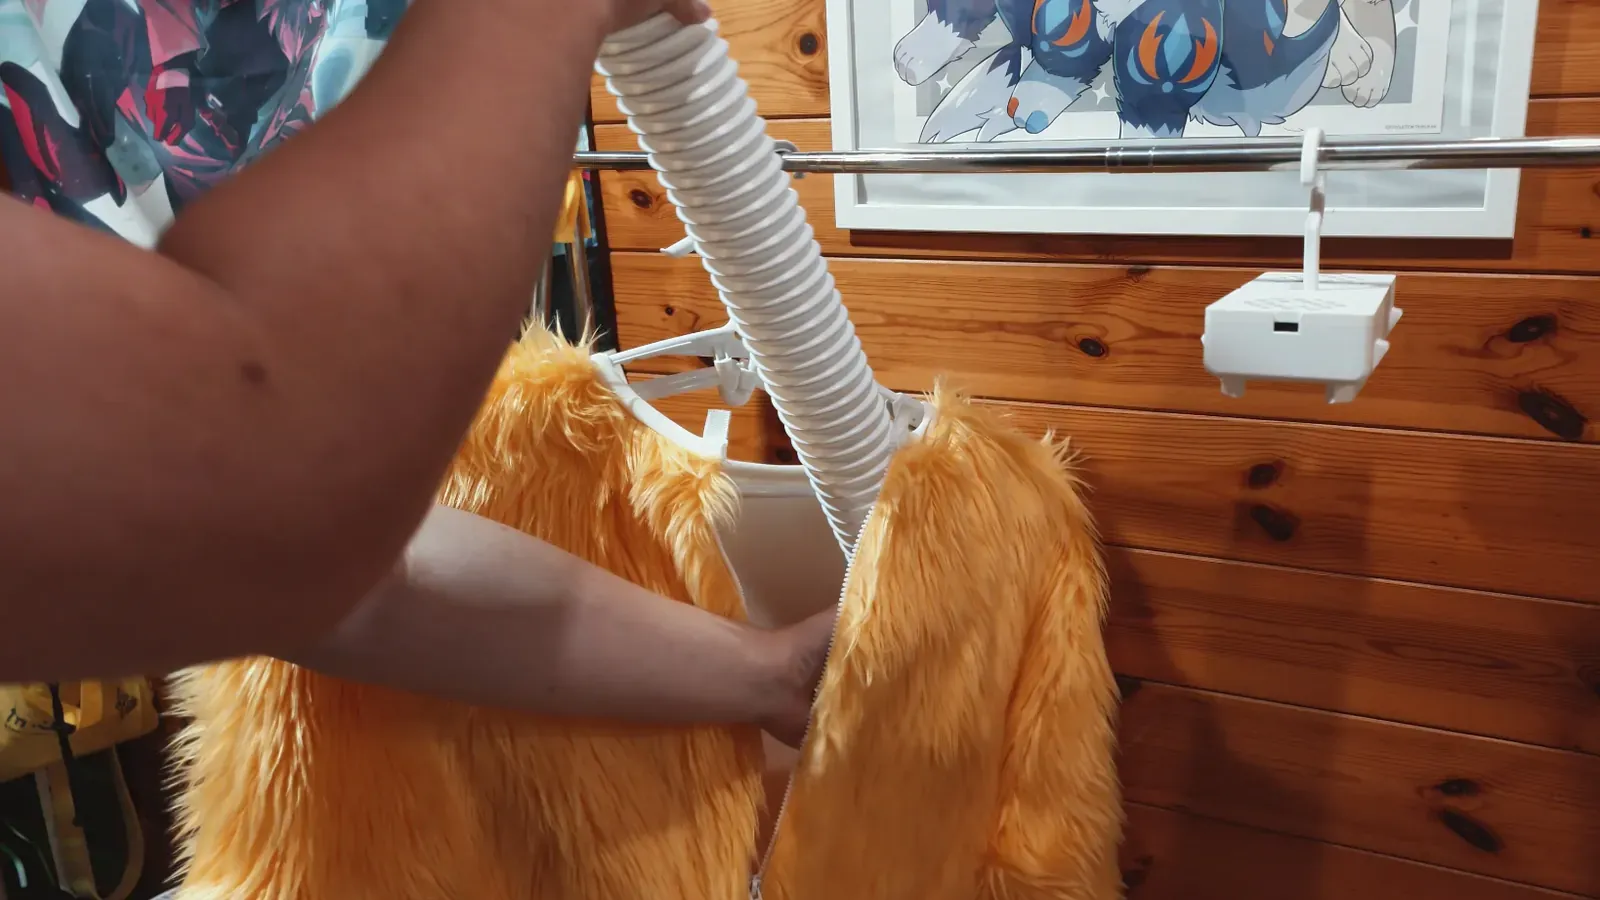
Push it toward the paw, leaving enough length at the top to connect it to the unit.
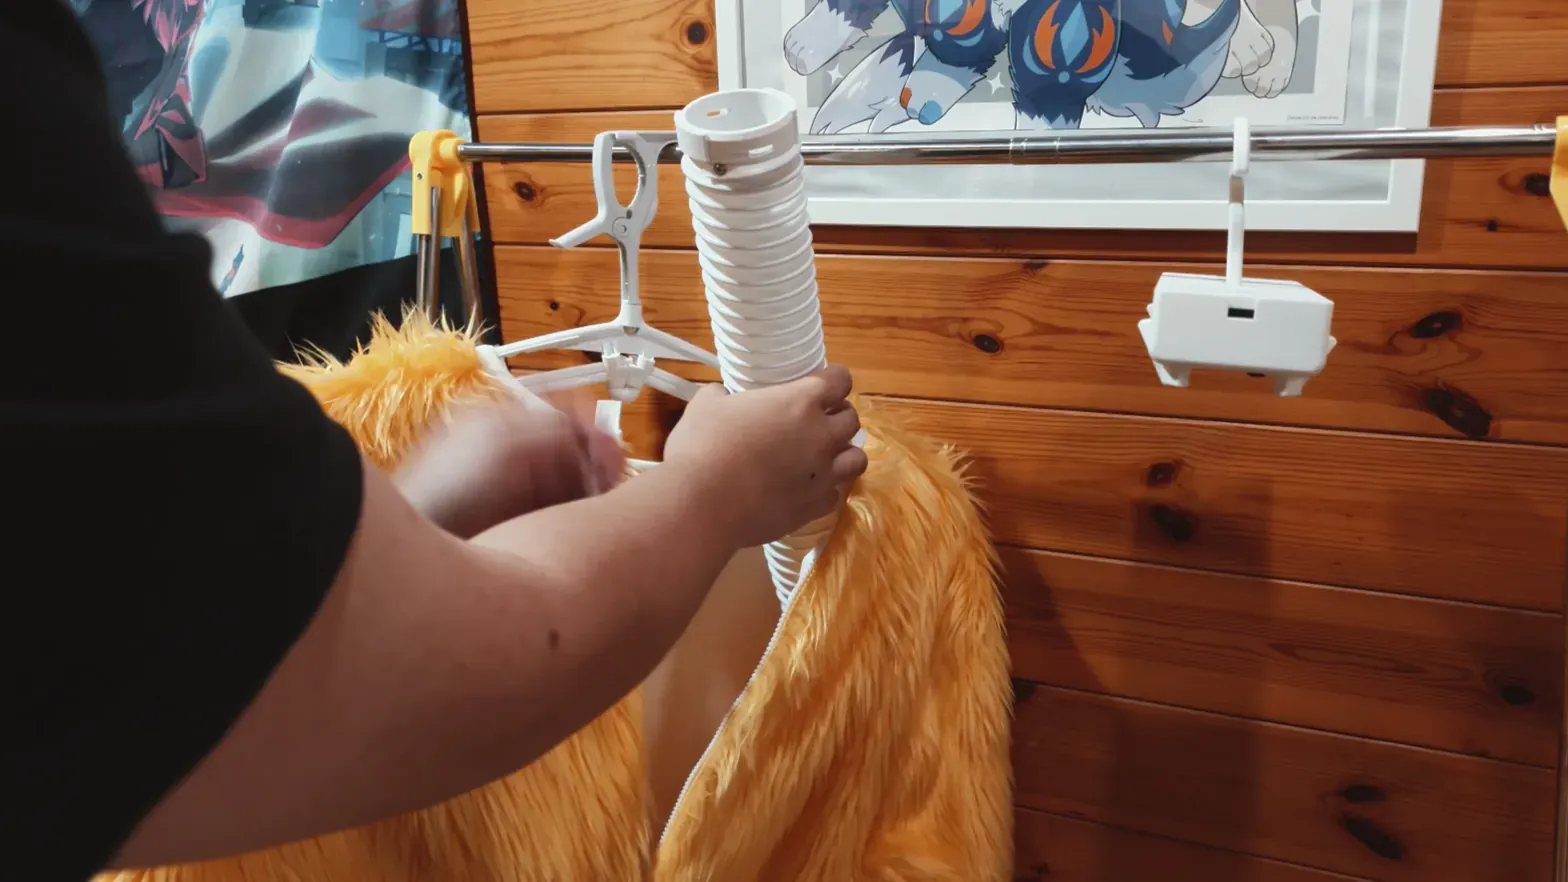
Align the upper end of the duct with the raised clip mount on one side of the unit.
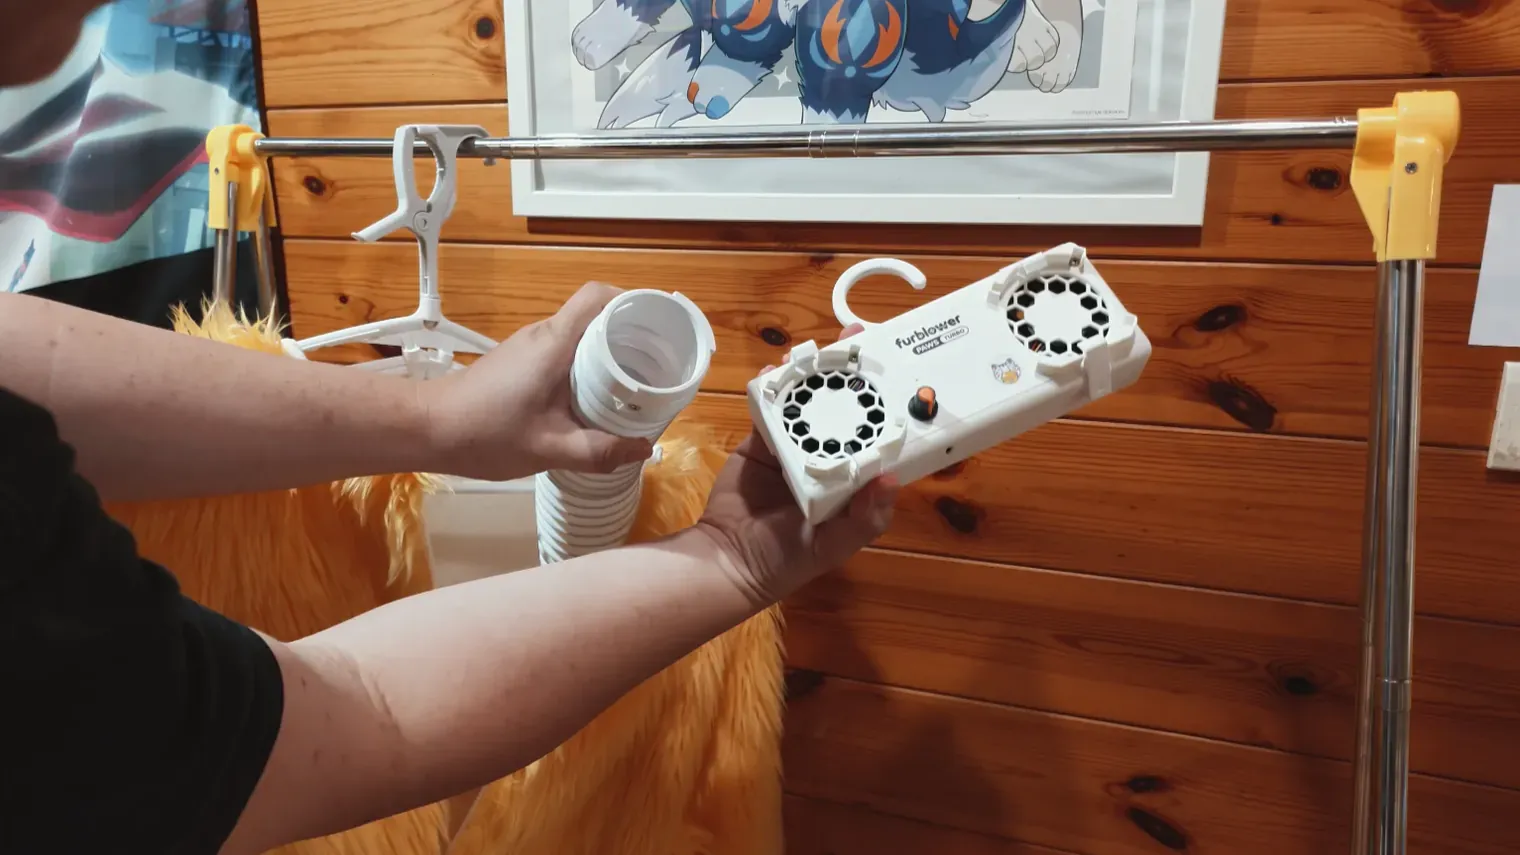
Fit the first duct and close the clip.
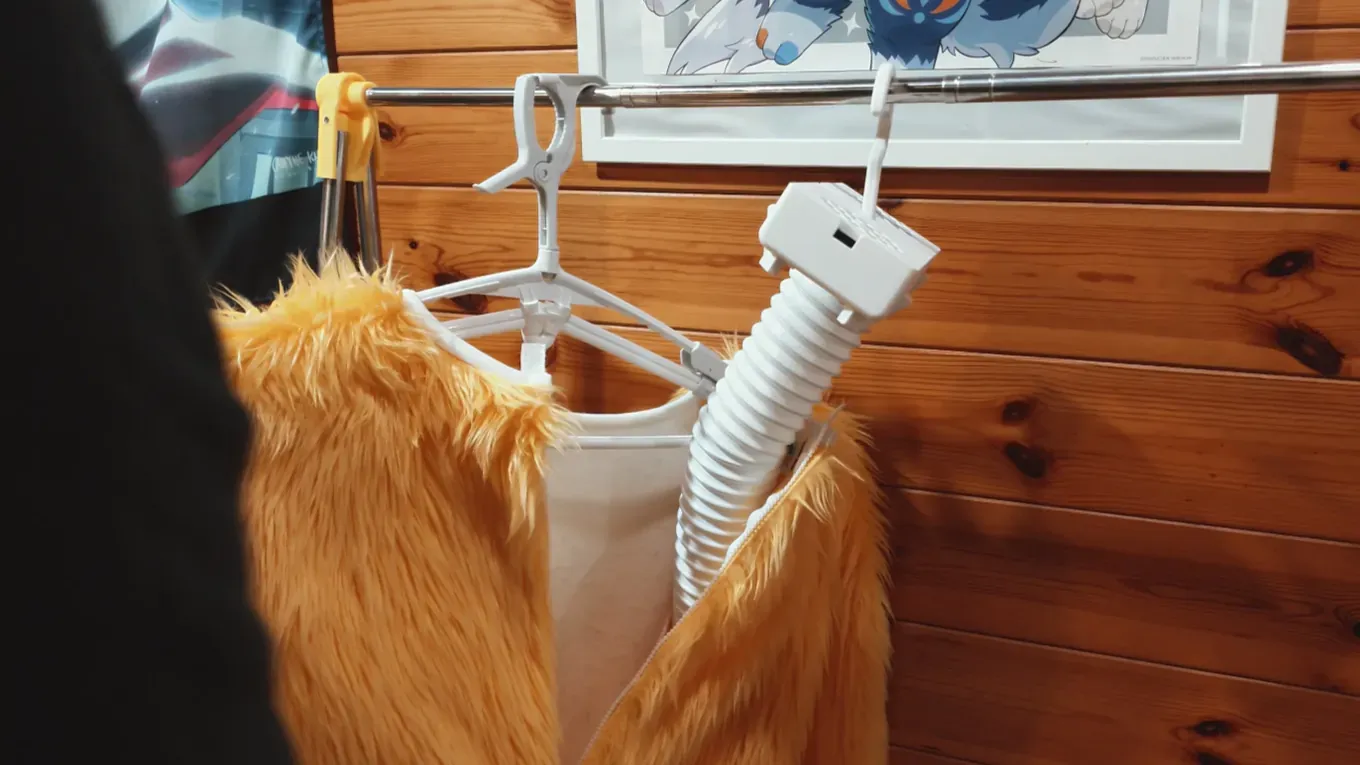
Route the second duct through the other sleeve.
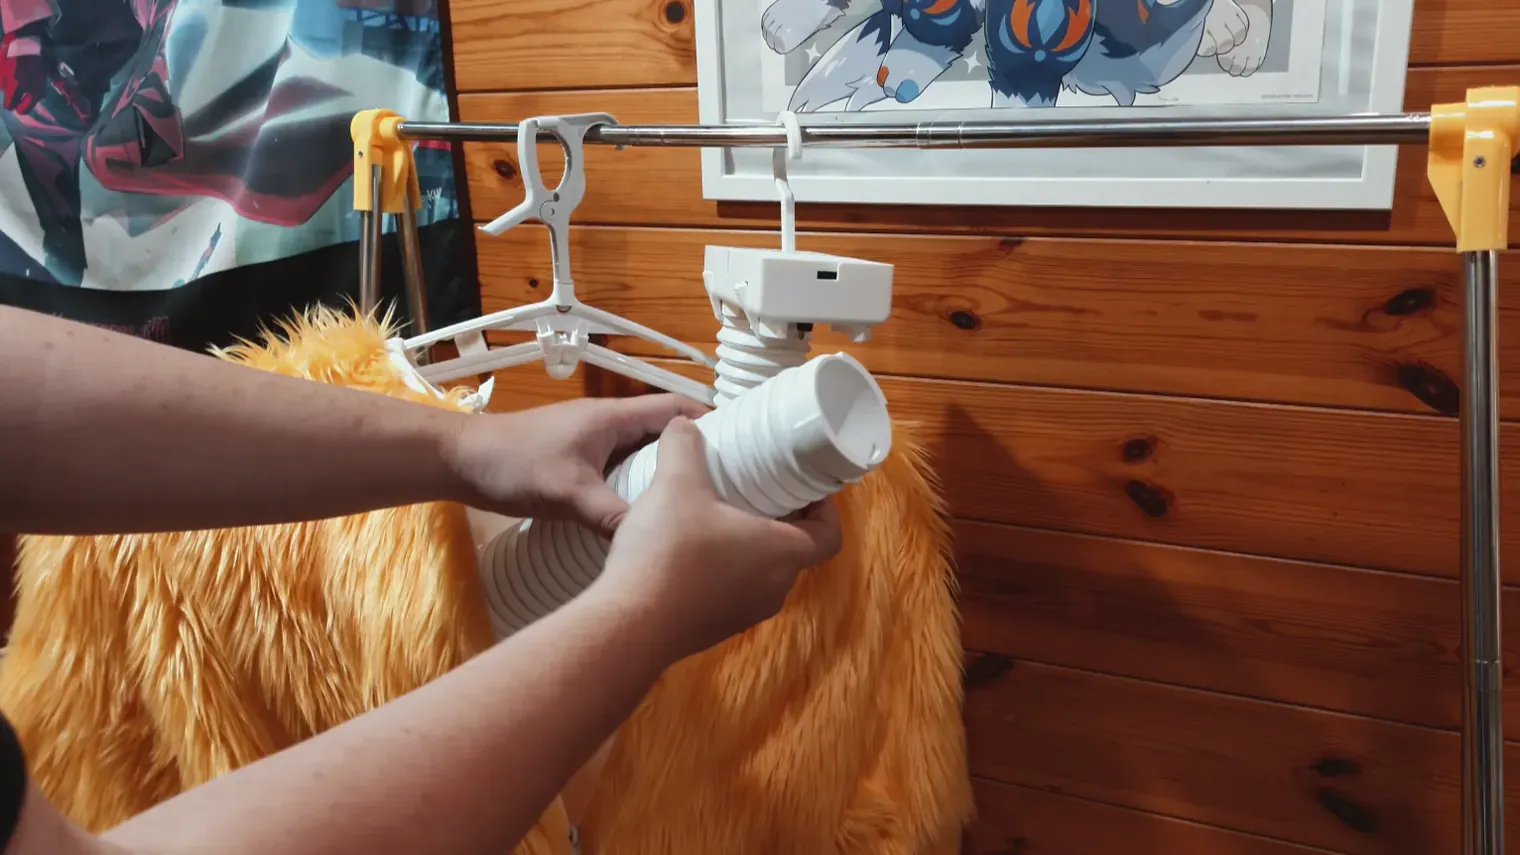
Pull it out far enough to reach the unit.
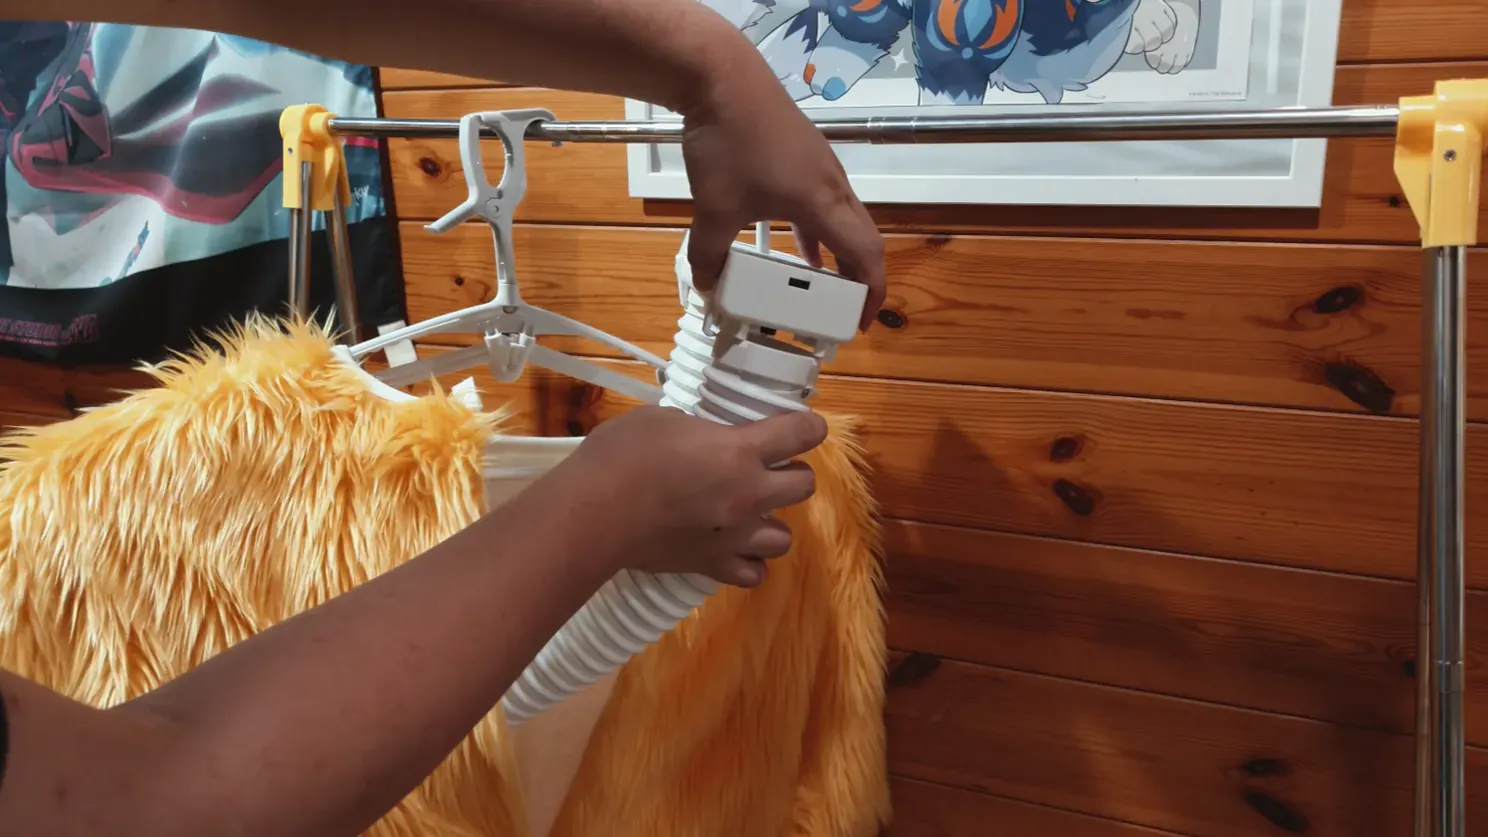
Align it with the other clip.
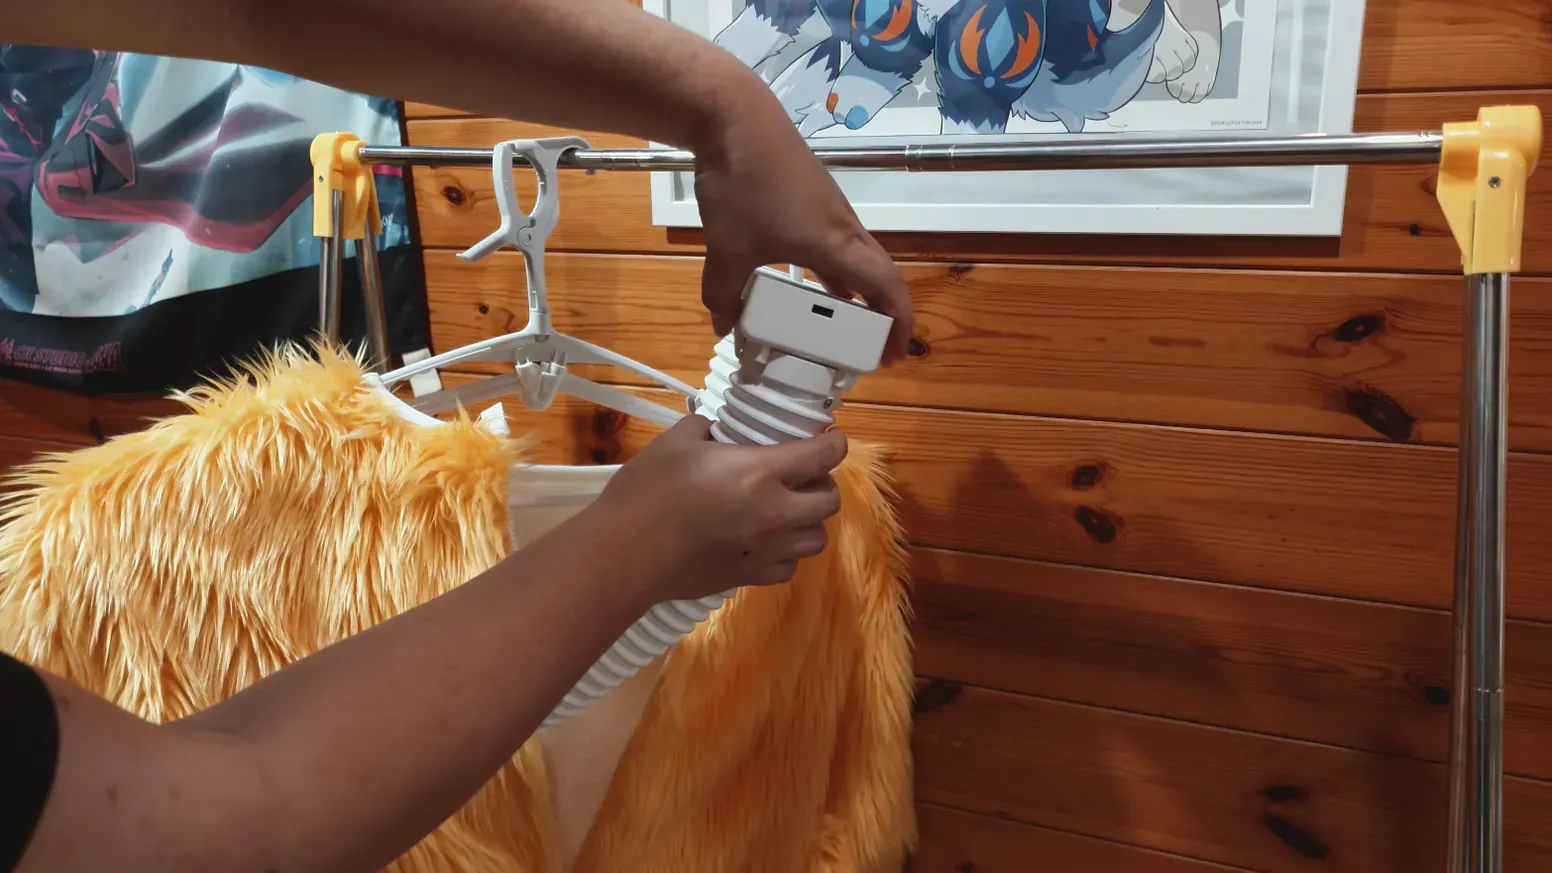
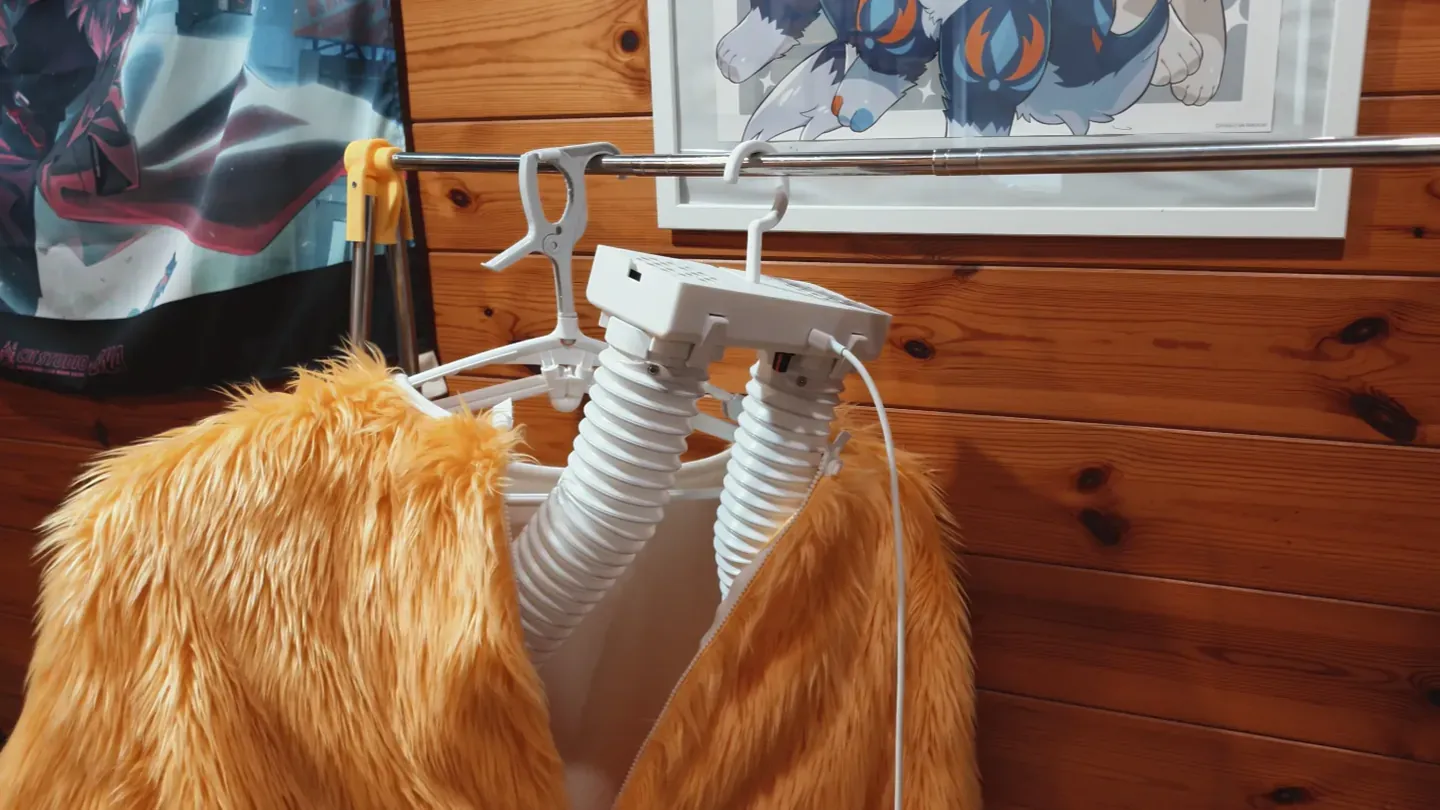
Close the clip and check that both ducts are secure.
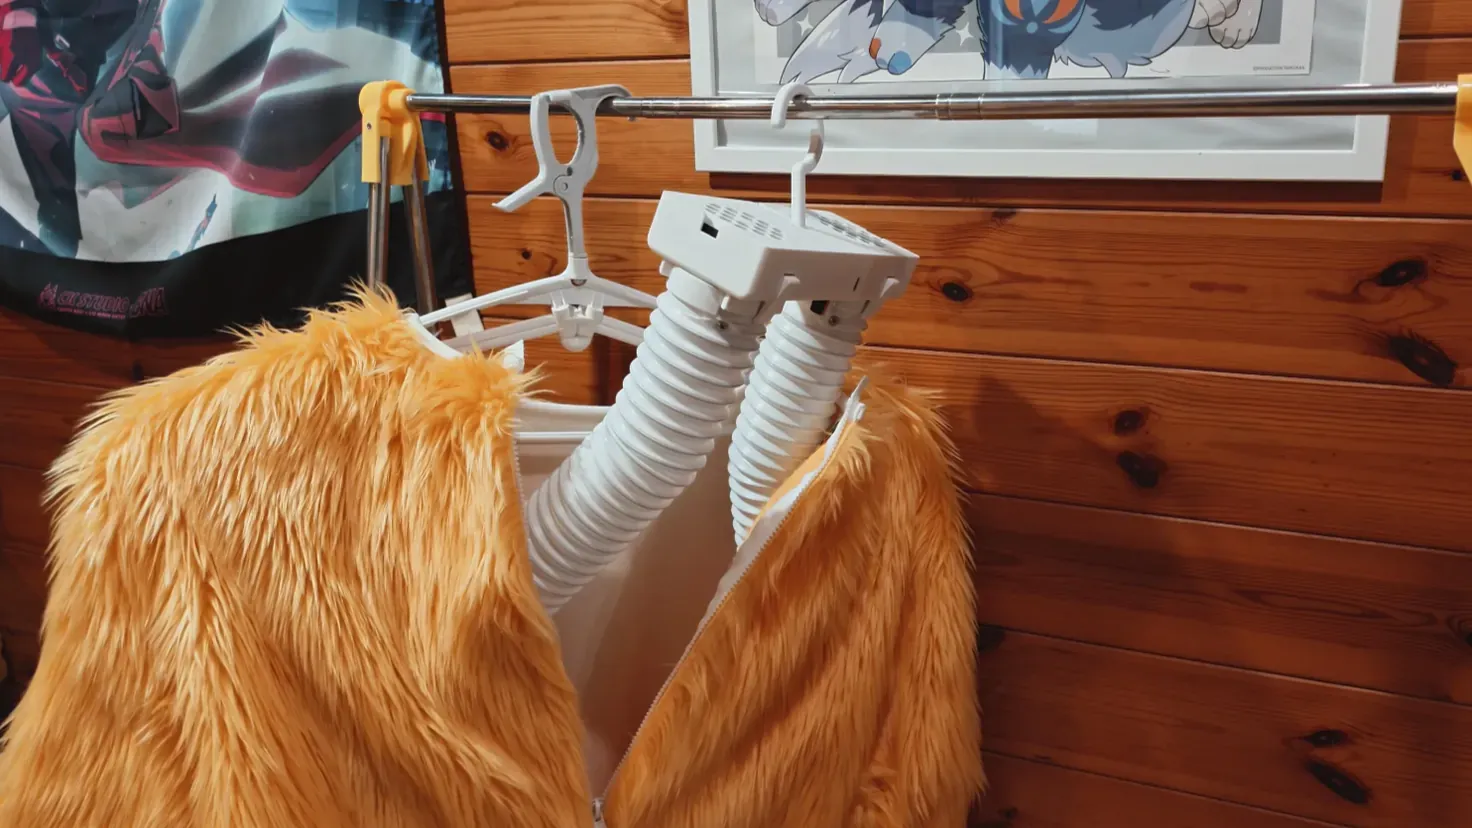
Start the fans
Check the charger and cable against the power table above and connect USB-C.
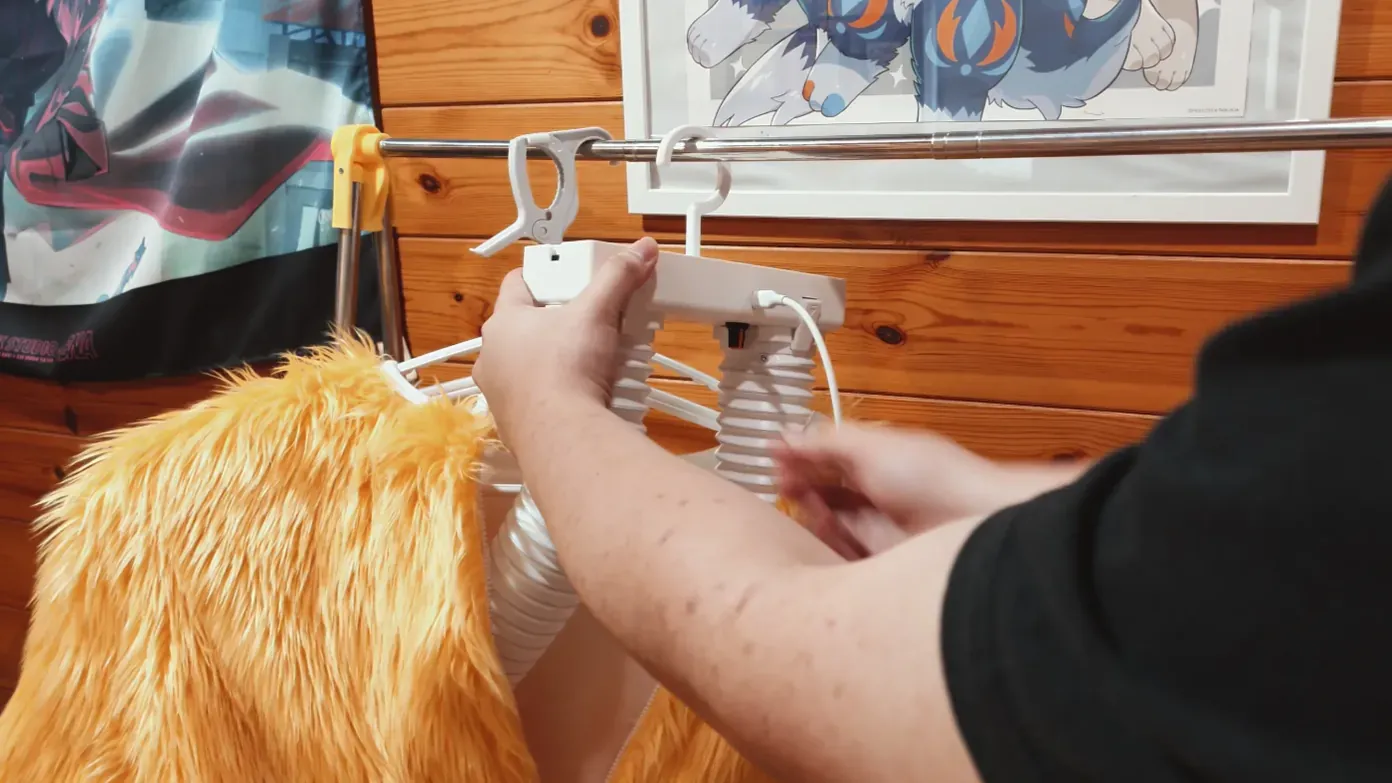
Turn the dial clockwise until it clicks to start the fans, then turn it further to adjust speed.
Check that both ducts are secure and supplying air.
Frequently asked questions
What warranty and repair support is available?
Damage not caused by the user is covered for 180 days from shipment. After the warranty expires, you can contact the laboratory about paid repairs. We will tell you the cost based on the actual condition.
Can you clean a dirty fan?
Yes. The laboratory offers a free cleaning service. Contact us first to confirm shipping and handling arrangements.
Can I use a USB-A to USB-C cable or a power bank?
Yes, if the charger or power bank and cable provide the voltage and current your model needs. For full TURBO speed, check that the supply has a 12V/3A output profile.
Is there a reference charger?
The laboratory has tested various chargers and power banks. This model is one used by the store. Check its single-port output profile and your cable before buying.
My TURBO does not start after plugging it in. What should I do?
Check the power supply. Turn the dial back to off, reconnect power, turn it on again and increase speed slowly. Contact us if it still does not start.
Will a supply below 12V/3A damage my TURBO?
No, but the fans may not reach full speed. At 5V they run at a fixed minimum speed; at 9V they cannot reach full speed.
Can standard TURBO be converted to the Duct model?
Yes. Contact the laboratory on Telegram about a conversion. We will tell you the material cost.